Cloning a hard disk quickly and easily
Is your computer's storage space insufficient? Don't worry: cloning a hard disk is one of the simplest ways to free up space and make your computer run faster.
di Antonio Lamorgese
Cloning a hard disk is one of the most common operations today both for restoring computers and for installing SSD drives to replace an old hard drive. The operation itself is not complex, unfortunately, there are still many people who need this service and who usually turn to an expert for help. I think you, too, agree that hard drive cloning is an important step to take before installing a new operating system or new software on your computer. In this way, you will have the opportunity to restore your computer and data in the event of a failure to install the operating system or software that is particularly heavy for the system.
Now, if you are reading this guide it is because you are also interested in cloning and restoring your hard drive but cannot find the right software, or perhaps, you already have a backup, available on a different device, and you want to restore it to another computer. With Win32 Disk Imager you can clone hard drives and SSDs quickly and easily, without wondering if the selected device has been formatted correctly or not. In any case, you will get perfect copies of damaged or lost media in a safe and simple way. Now, let’s see how to do it via Win32 Disk Imager.
Table of contents...
1. What to do before cloning a hard disk
Without a doubt, in order to clone a hard disk it is necessary that there are no resources or files open on the drive to be cloned. Therefore, you cannot clone a hard drive on which the operating system is booted. It is necessary to remove the hard disk to be cloned and attach it to a second computer via a SATA to USB adapter.
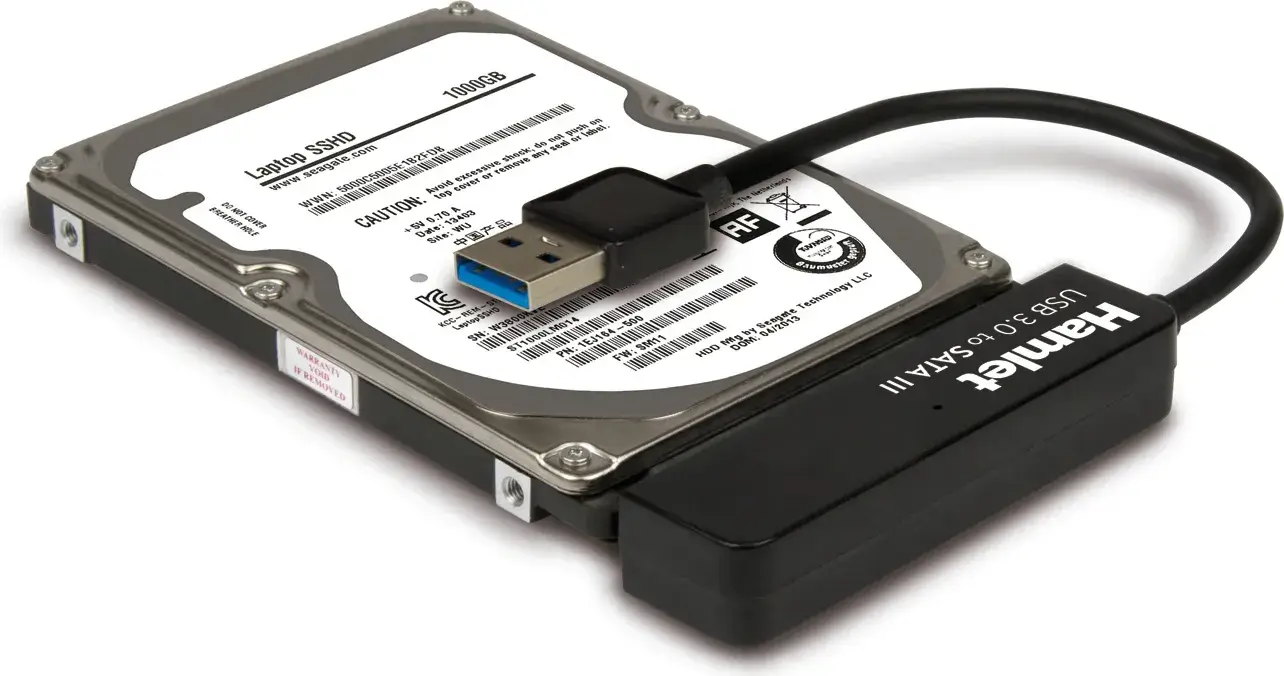
This adapter, which costs a few tens of euros, can be found everywhere and is also very useful for restoring and recovering data on damaged hard drives. Then, once you have removed the hard disk to be cloned, connect it, via this adapter, to another computer where you can run Win32 Disk Imager and start the cloning process.
2. How to install Win32 Disk Imager
Ok, at this point you are ready. Your hard disk to be cloned is connected to the USB port of a secondary computer, perhaps a laptop, and then you can download Win32 Disk Imager from this computer by clicking on this link.
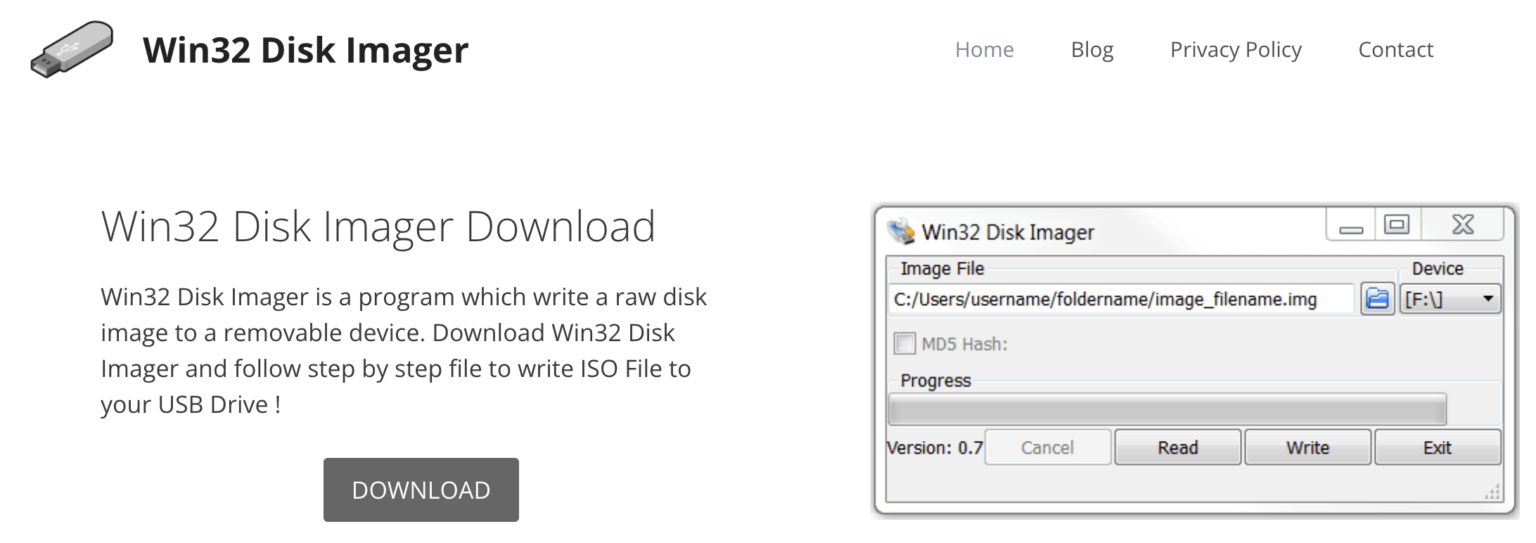
Click on the “Download” button and download Win32 Disk Imager. Once the software has been downloaded, you can proceed with the installation by following the procedure offered by the program itself and typical of any software installation on a Windows operating system.
Read more: “How to repair corrupted USB drive”
3. How to clone a hard drive with Win32 Disk Imager
The procedure is simple and involves two steps. In the first phase, the source disk image is created on a file with the “img” extension. In the second phase, after having unhooked the source disk and connected the target disk to the adapter, we proceed with the selection and writing of the image file on this hard disk. Both the first and the second phase require relatively long times and, within a couple of hours, you will be able to clone hard drives of a few hundred GB.
3.1 Create the source disk image
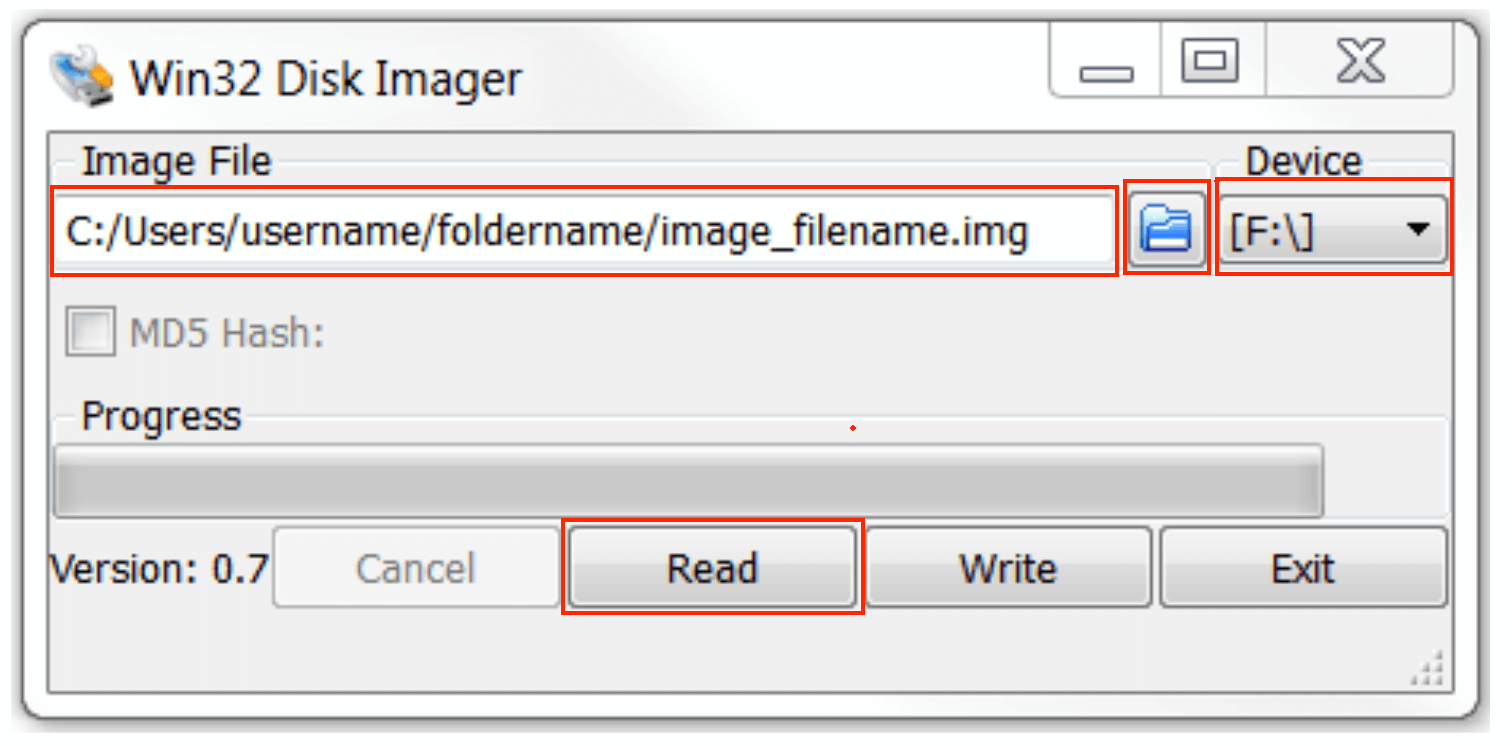
Now, having the source disk connected to the computer, you can start Win32 Disk Imager, you have to choose the device by clicking on the arrow relating to the “Device” field and click on the icon depicting a floppy indicating the path and name of the image file. At this point, clicking on the “Read” button will start the procedure for creating the image file.
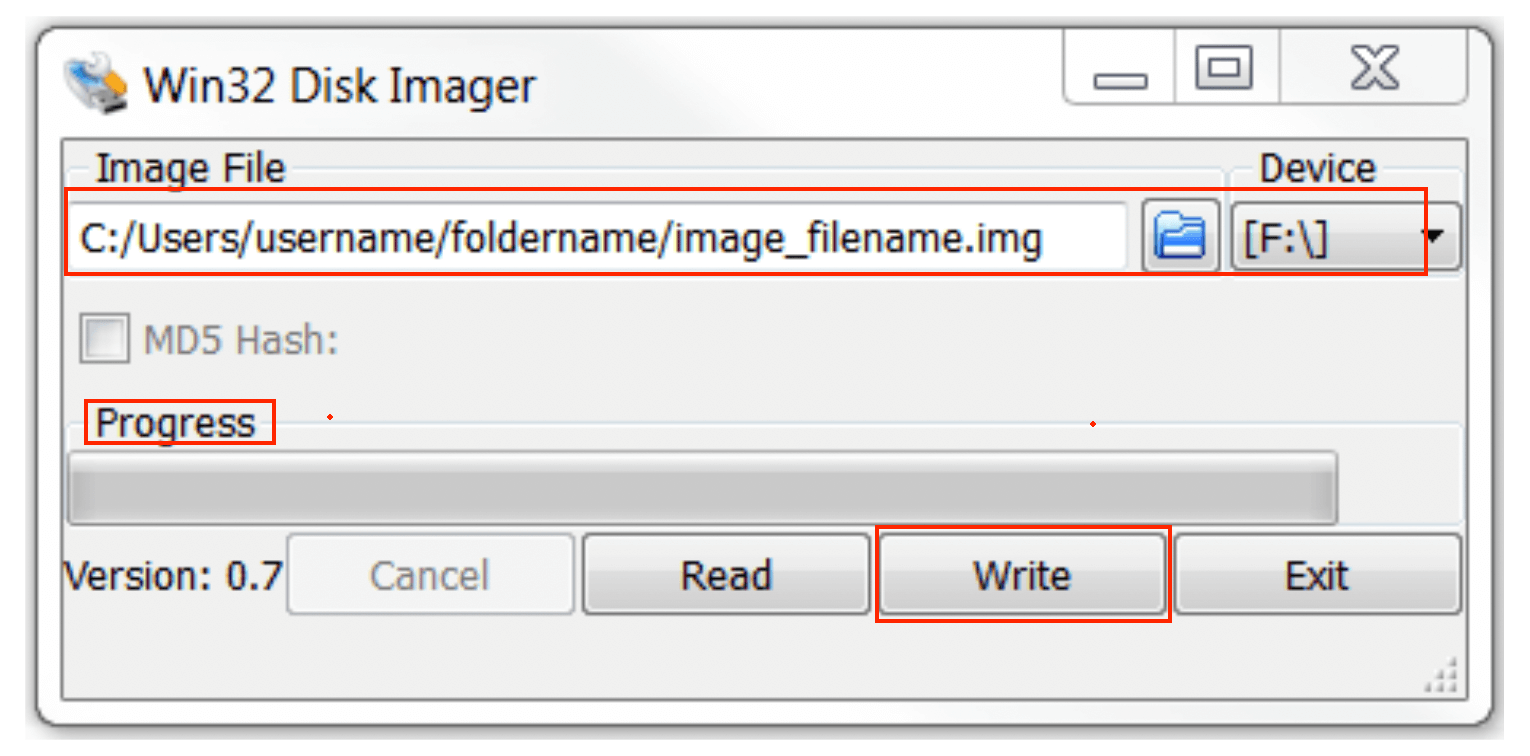
3.2 Write the image to the destination disk
Before proceeding with writing the created image, you must unhook the source disk and hook the destination disk to the SATA -> USB connector. At this point, again with Win32 Disk Imager, by clicking on the icon depicting a floppy you will browse the computer resources until you reach the image file you just created. Choose the device, ie the drive corresponding to the destination disk, and proceed with writing the image file to the new hardisk by clicking on the “Write” button. Once the image file writing procedure is finished your hardisk will have been cloned and ready to replace the original one.
4. Conclusion
All cloning software has procedures that are surprisingly simple. Some of these software have important restrictions that make them less suitable for beginners, others, however, are so simple to use that even a beginner can perform a complex operation, such as cloning a hard drive, without any problem. Apart from that, it is just a matter of connecting the target drive to the computer, preferably using an external USB adapter, and starting the cloning software. The process can usually take some time, but this depends on the amount of data to be copied and the writing speed of the destination disk, but with a little bit of effort you can clone a hard drive quickly.
Just to dispel any doubts, on this much requested topic, I suggest you follow this video tutorial where you will see, in detail, how to clone a hard drive to an SSD, one of the most common operations, larger SSDs. This system, alternative to the one explained in this guide, is just as simple, fast and without losing data.
Read more: “How to speed up a MacBook with CleanMyMac“