Controlling Raspberry Pi GPIO Pins from Script
We will learn, in this guide, to use a Bash script, therefore, without using a traditional programming language, to operate LEDs using the Raspberry GPIO pin control.
Table of contents...
Required material
First, but it is well established that it is, we need a Raspberry Pi (I will use the Pi 3 Model B, but any model with GPIO pins will work just fine – in case you want to use a Raspberry Pi Zero you will need to do some soldering). I assume you have at least a Pi 2 or 3 with 40 pins;
A power supply for your Pi, usually already supplied in the box;
A case is usually recommended to protect the Raspberry Pi (although you will have to leave the lid slightly raised to expose the GPIO pins to connect the LEDs);
A Micro SD card on which to install the operating system (or use the operating system pre-installed on the MicroSD already supplied);
A set of led traffic lights from Low Voltage Labs;
A USB keyboard to configure and program the Raspberry;
An HDMI monitor to connect to the Raspberry;
Fixing the traffic light
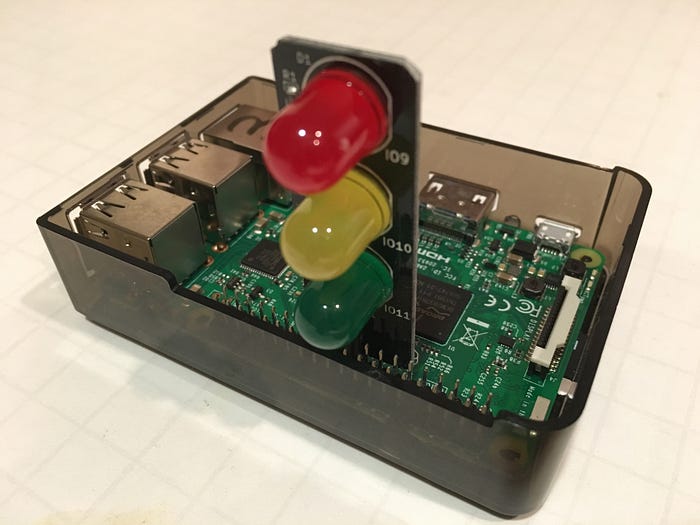
The traffic lights from Low Voltage Labs connect to the Raspberry Pi using four pins. One of these must necessarily be connected to the ground, the other three are 3 pins of the GPIO used to control each single LED.

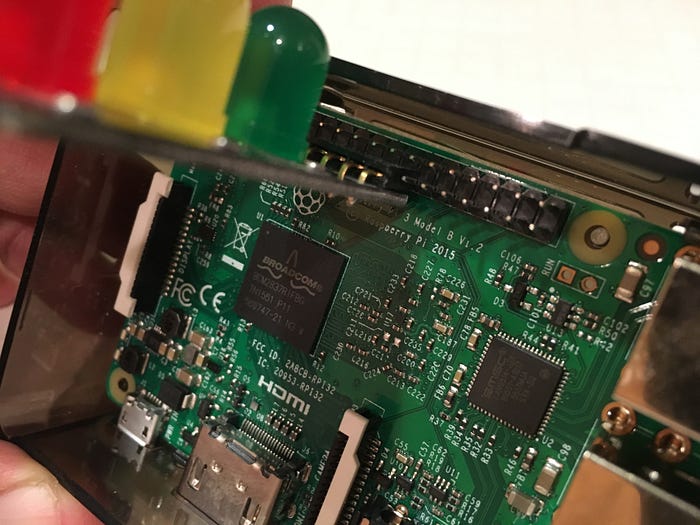
Before turning on the Raspberry, connect the traffic light so that the pins connect to the GPIO pins highlighted in red (see figure):

A simple way to make sure you have it correctly connected is to identify the row of GPIO pins to use, then, while looking at the Raspberry with the USB ports at the bottom, count 8 pins and connect the traffic light exactly as in the figure).


Do not turn on the Raspberry yet, first you will need to get an image of the operating system to install …
Operating system configuration
Install the Raspbian operating system (usually already present on the MicroSD) which, however, can also be downloaded directly from the official Raspberry Pi website.
I found a useful free tool called Etcher available on the Resin.io website to transfer the operating system image directly to the micro SD card, without worrying about having to format it first or perform other preliminary operations.
This operation is also very simple to carry out, in any case, watch this video to carry out the operation in total safety.
Once the operating system is installed, make sure you can log in and have a working wired or wifi internet connection set up.
Now you can continue to the next step and start turning the LEDs of our traffic light on and off…!
Dependency installation
Since Bash comes with the operating system, the only thing left to install is git, which will allow you to download the script ready to be executed by the Raspberry from the internet, then type the command lines directly from the terminal, which will allow you to install git and download the sample code from the internet ready to put our semaphore into action:
$ sudo apt-get install git
$ git –versiongit
Download the sample code
Click on this link and then on the green “Code” button and again on Zip download. Or type the following command directly from the terminal:
$ git clone https://github.com/simonprickett/bash-traffic-lights-pi.git
Unzip the zip file and inside you will find the “bash-traffic-lights-pi-master” folder with some files inside it including the “trafficlights.sh” file.
At this point, drag the “bash-traffic-lights-pi-master” folder to the desktop, and keep it pending for a few minutes, we will need it later.
The “trafficlights.sh” file contains all the commands in bash to be able to configure the GPIO lines and activate the led traffic light.
Access to GPIO pins from Bash scripts
Without adding additional dependencies, Bash scripts can access and control the Raspberry’s GPIO pins using sysfs. The process of configuring these pins is limited to the simple management of a set of filesystem paths that can be manipulated to configure each single pin of the GPIO as input or output and to set and / or read their values. On Raspbian, these paths look like this:
/sys/class/gpio/gpio<pin_number>
and each has a /direction (direction for example, in and out) and a /value (value), for example for GPIO 11:
/sys/class/gpio/gpio11/direction
/sys/class/gpio/gpio11/value
As we will see later in this article, the direction and the value can be set by passing appropriate parameters to these “paths” as the root user on the Raspberry.
The pin numbering scheme used by sysfs is the one provided by Broadcom (BCM), so the pin numbers you need to use will correspond to those shown in the figure:

Running the script
Starting the script is simple, first of all from the decompression, carried out previously, of the zip file from the GitHub repository we obtained a folder located on the desktop, remember?
Now type the following commands to be able to run the script:
$ cd bash-traffic-lights-pi
$ sudo ./trafficlights.sh
To stop the demo, press Ctrl-C at any time.
Note the use of sudo when starting the script. This allows it to function as a root user with access to write the file paths needed to control GPIO pins using sysfs.
How does it work
Taking a look at the code contained in the trafficlights.sh script, we can see that:
Lines 1 to 13 set some variables in order to associate more meaningful names to these variables which will be subsequently recalled in the script.
The red LED is on GPIO pin 9, the yellow one on pin 10 and the green one on pin 11. We have also abstracted the base path /sys/class/gpio as we will use it very often and therefore to avoid repetition we will use the associated variable for convenience .
ON and OFF are used as they are more significant than the actual Boolean values 1 and 0 that will be used by the script.
Export of pins
In order to use a GPIO pin via sysfs, we must first “export”, through the export command, the paths relative to the various pins to make the subsequent commands for managing the GPIO lines available.
The exportPin function on lines 16–21 does just that. For example, to export pin 9 will use the following command:
echo “9”> /sys/class/gpio/export
This creates an appropriate / sys / class / gpio path structure for pin 9 but an error will be raised if those paths already exist. To work around this, the exportPin function first checks and will export a pin, only if the path doesn’t already exist.
Setting the direction of the GPIO pins
The pins can be used, respectively, for the input or output of a signal. In this case we have to use them as outputs to control each of the three LEDs on the traffic light.
The setOutput function (lines 24–27) does this, via the “out” parameter sent to the “direction” folder for the respective pin. Example to set GPIO pin 9 as output, you do it by running the following command:
echo “out”> /sys/class/gpio/gpio9/direction
Lights on and off
The setLightState function on lines 30–33 manages the switching on and off of each LED by setting its respective GPIO pin to high (1 – on) or low (0 – off).
And it does so by writing the value 1 or 0 to the “value” path for the desired pin. Example for pin 9 of the GPIO the following command sets this pin to logic 1, then to 3.3 volts, and then the relative connected led will light up:
echo “1”> /sys/class/gpio/gpio9/value
Deactivation of everything on exit
The code will run in an infinite loop that ends when you press Ctrl-C and the SIGINT signal is sent to the script that will block its execution.
To turn off all three LEDs when this signal is sent, we need to intercept and manage the SIGINT signal. This is achieved with the code on lines 44-50 defining a shutdown function and registering it as a handler for the SIGINT signal.
shutdown calls another utility function which in turn calls setLightState which turns off the three leds. It then uses exit to cleanly abort the script, thus returning control to the Linux shell.
The main loop
The script entry point begins at line 52 and uses the functions defined above to export each of the three required pins and set them as output. Then it calls the utility function allLightsOff which guarantees that all three LEDs of the traffic light are off in order to be in the required state to then start the loop.
Lines 66 through 89 go through an infinite loop in which we use setLightState to turn the individual traffic light LEDs on and off in order.
The sleep command allows the code to maintain the status of the LED concerned for a few seconds before moving on to the next one.

