Passwords and more passwords everywhere. Once the management of all our passwords was simple: we had at most one username and password, but with the exponential increase of web services, which each of us uses every day, we are forced to remember so many, that the situation it can become difficult to manage. Having a password manager at your disposal is better than relying on your memory, or on pieces of paper scattered here and there. At this point I think you agree that relying on one software to manage all of your passwords is your best bet. Now, you may be wondering: “What software to use to manage all my passwords in total security?”. There are many password managers on the net, but here the thing is so serious that you should waste a lot of time to find the one that best suits your needs. I found one that, according to the reviews of the most expert, is undoubtedly the most reliable. DashLane is the most secure free password manager to date. In this guide I will explain how to use it to manage all your passwords in total security.
1. DashLane the best free password manager
It is estimated that the average person has more than 1,200 accounts to manage. Each of which with associated credentials to manage. This can be a problem, especially for those who already have the hassle of having to remember so many other things. For example, from your personal password to your work account to access useful resources for your office. Furthermore, to all this we add the fact that many people have different passwords for their most important accounts, obliged by the fact that each service imposes different rules and criteria for managing access passwords. This is where software like DashLane can be extremely useful for managing all your accounts. Now let’s see how it works and what are the advantages of Dashlane.
2. The benefits of DashLane as a password manager
Dashlane is paid software, but like all products, it also has a free plan that allows you to store up to 50 passwords and share these passwords across 5 different devices and platforms. You can fill out your login forms automatically with just one click. Dashlane will enter your password and fill out your personal data wherever you need it and on any device. It will generate passwords automatically, following the safest guidelines to create secure and hard-to-find logins. Now, let’s see in more detail how it works.
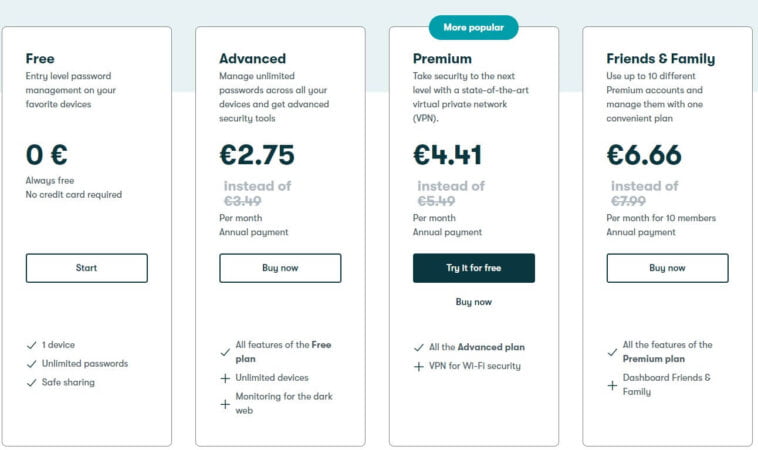
On top of all this, Dashlane uses AES-256 encryption. I don’t know if you’ve already heard of it, but we’re talking about a very secure and unassailable encryption system. In fact, even Dashlane can’t figure out your passwords. The use of AES-256 encryption takes the protection system of your passwords to a “Top Secret” level. In practice it is the encryption system used by governments, banks and all the armed forces of the world. In short, the AES-256 encryption has never been violated. However, before moving on to see specifically, Dashlane, if someone will find limited some features of the free package, they can switch to the paid plans that offer unlimited options, as shown in the figure.
3. Install DashLane
Before proceeding with the installation of Dashlane, know that the paid plans are divided on the basis of two different categories: “Personal” and “Business“. To take advantage of the free plan, you must necessarily refer to the plans provided for the “Personal” category. As for the free plan, Dashlane exists as a Chrome browser extension. So, the first thing to do is click on this link and add Dashlane to Google Chrome.
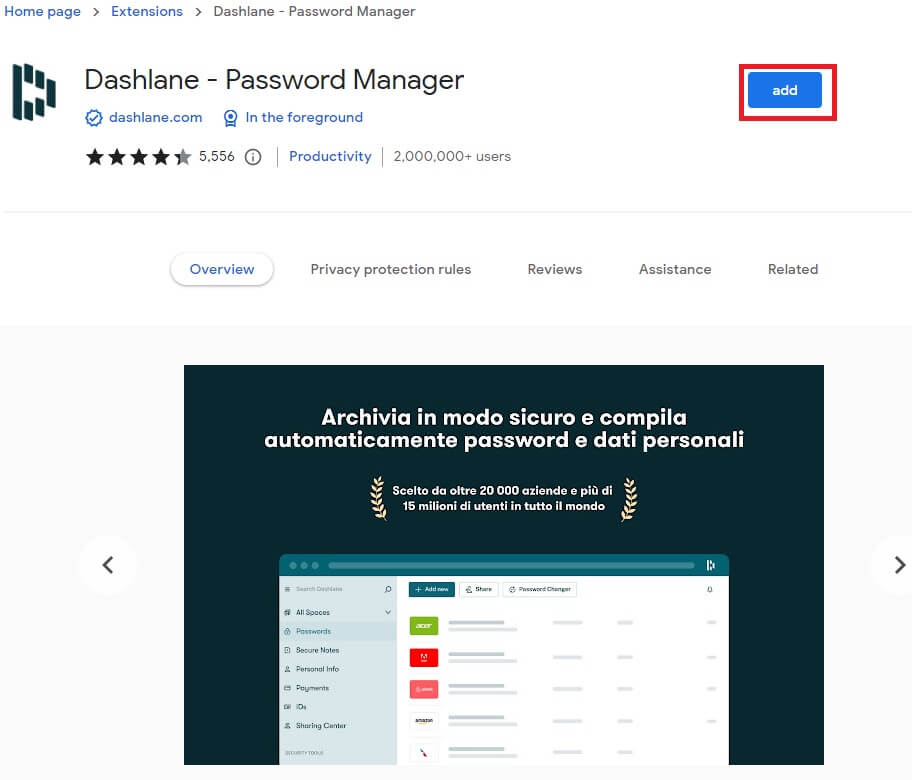
Click on the “Add” button and then on the “Add Extension” present in the pop-up message confirming extension installation in Google Chrome.
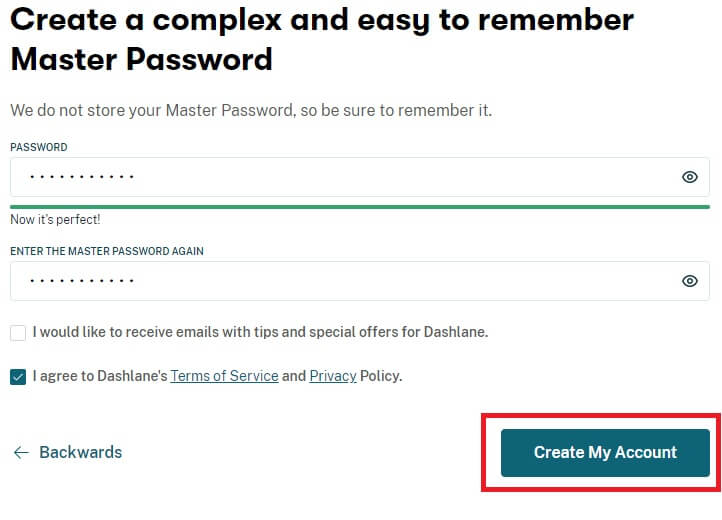
Within a few seconds, Dashlane will be downloaded and installed in Google Chrome. Now, all you have to do is create a free account and start using it. Then, click on the “Create an Account” button, enter your personal email address and click on the “Next” button. At this point, specify a secure password twice for logging in to Dashlane, accept the terms of service and click the “Create my account” button again.
Click on the “Switch to app” button and start your new online life.
Read more: Windows 10 reset password tool
4. Add login in DashLane
Once you’ve installed Dashlane in Google Chrome, you’ll be ready to store all of your logins within the Dashlane Dashboard. To do this you must click on the Chrome extensions icon located at the top right and select the “Dashlane – Password Manager” item.
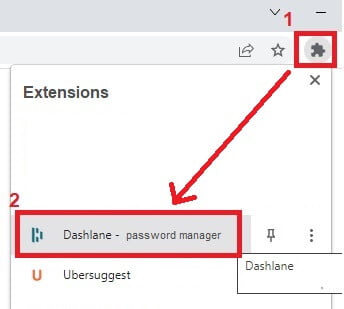
This will open Dashlane and you can enter your first login. To do this you must click on the icon below showing the “+” symbol. At this point the extension will be called again and you can enter all the required values. For example, to add access to GMail you need to fill in the first access entry form, as shown in the figure.
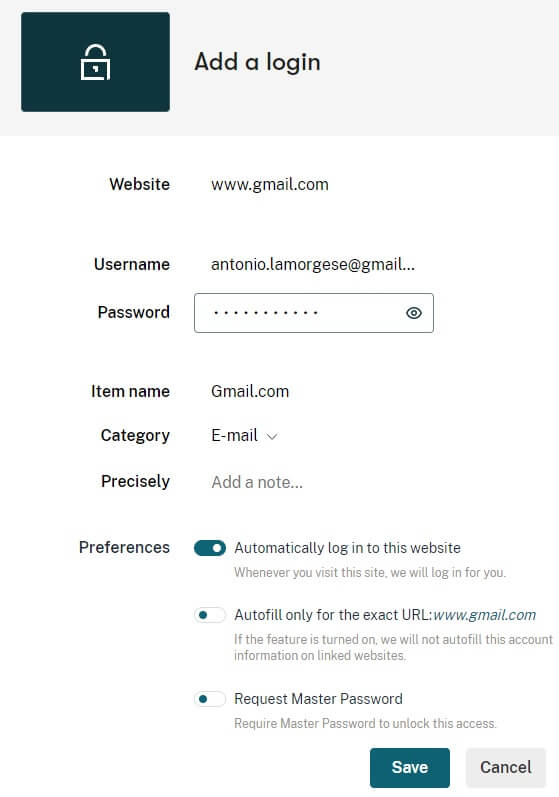
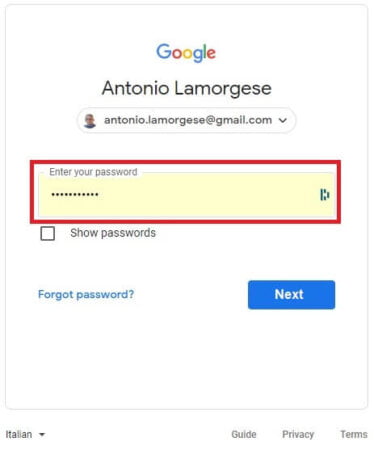
After entering all the data, click on the “Save” button. From now on, every time I have to access Gmail, Dashlane will pre-fill the password field, automatically taking it from its database.
5. Edit logins in DashLane
Whenever you wish to add other accesses or modify existing ones, you will need to access the Dashlane Dashboard, always clicking on the Google Chrome extensions icon and selecting the relevant item in the list of extensions installed in the browser.
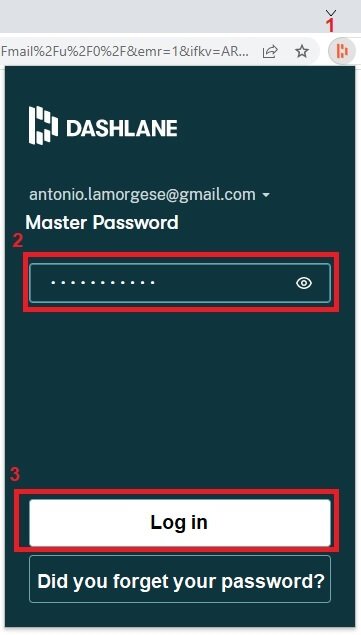
Enter the “Master Password“, indicated during the extension installation phase, and click on the “Login” button. From now on, you can manage all the logins entered in Dashlane and modify them as you wish.
Read more: How to uninstall apps on MAC
6. Conclusions
As I told you previously, there are many other password managers that you can use, even if “DashLane” remains the safest and most appreciated by experts. In any case, I advise you to follow this video tutorial, where you will be able to learn about other alternative password management systems to DashLane.

