
How to create a web application with PHP and Zend Framework
In this guide, I'll tell you how to create and manage a web application in PHP with the free and ready-to-use Zend framework.
di Antonio Lamorgese
As you well know, PHP is one of the most popular server-side programming languages used to develop web applications. But maybe you don’t know that to develop a web application, regardless of the programming language used, it is necessary to create an effective software structure in order to be able to manage and maintain it in the best possible way. To do this it is essential to use an architectural pattern, such as the Model-View-Controller (MVC). This architectural model divides a web application into three distinct and separate modules: Model, View and Controller.
This means that it is possible to create applications that are more structured, modular, reusable and maintainable. All modern web applications use this type of architecture. to do this, in PHP, there are numerous free libraries and frameworks that with a simple command create the initial structure of the application and make it immediately bootable. In this paragraph we will see an MVC application developed with the Zend Framework library as an example.
Table of contents...
1. Introduction to the Zend Framework
A developer, at the beginning of any new software project, inevitably finds himself creating a software structure that is robust and effective. What matters is that this structure is maintained throughout the life cycle of the application. This approach will lead to lower maintenance costs, better performance, and easier code expansion and maintenance. In this regard, the Zend Framework helps you enormously and lends itself very well to developing web applications efficiently, providing practical examples of already proven architecture models such as Model-View-Controller (MVC) or Active Record.
Now, before proceeding, you need to install a web server. There are many web servers out there, but the most popular is undoubtedly Apache. Apache is Developed and maintained by the Apache Software Foundation, and is open source software available for free. Currently 67% of all web servers in the world use Apache. It is a fast and reliable web server. It can meet the needs of many different environments and it does this by taking advantage of extensions. To install Apache Web Server is very simple. In any case, below, I report the commands necessary to install it on the various operating systems.
1.1 Install the Apache web server on Linux and MacOS
Installing the Apache server on Linux and MacOS is really a breeze. In fact, just open the terminal and type this command:
sudo apt install apache2
From now on, to start the web server, and possibly restart it if you have made any changes to its configuration file, again from the terminal you must type and execute these two commands:
sudo systemctl start apache2
or
sudo systemctl restart apache2
1.2 Install the Apache web server on Windows
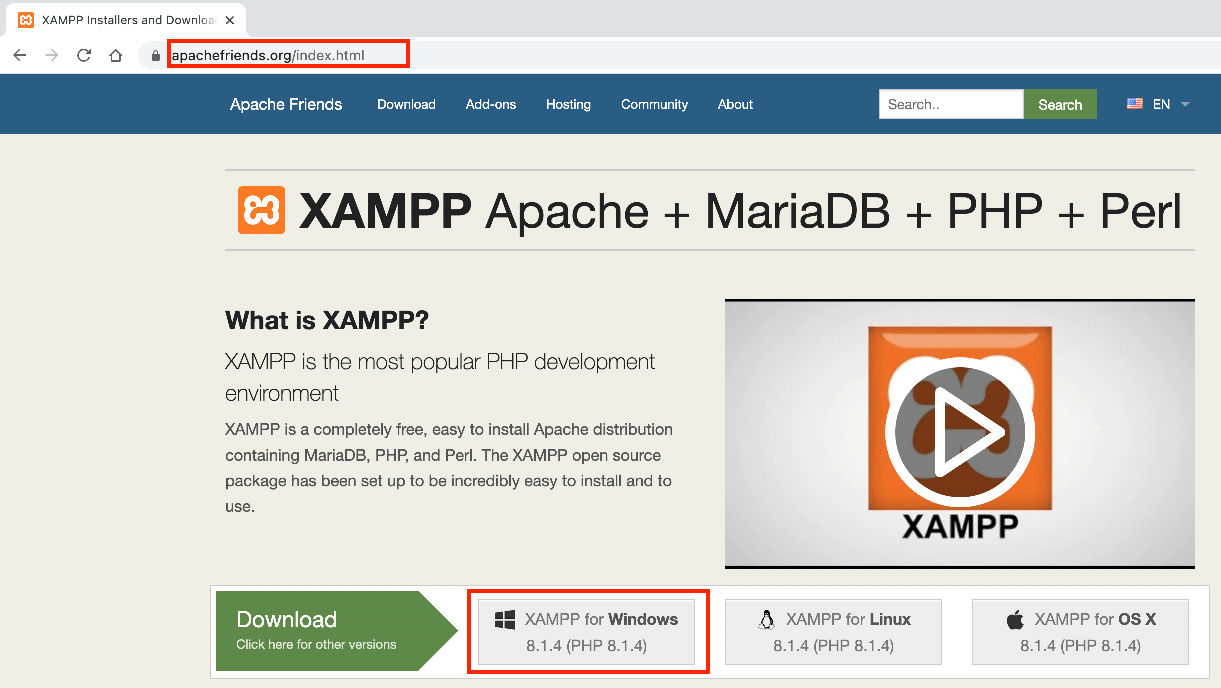
To install an Apache web server on Windows you need to click on this link, and continue by downloading and installing an open source package called XAMPP. The procedure is also very simple, in fact, all you have to do is download the 64 or 32-bit version suitable for your operating system and continue following the operations proposed by the installation wizard.
Now, that you have a fully functional web server, you can continue with the installation of the Zend Framework. In this guide, you will learn several techniques for giving your software a solid and effective structure in PHP using the Zend Framework.
2. How to install Zend Framework
To install the Zend Framework you must first install Composer. Composer is an automatic dependency manager. Before installing composer make sure you have PHP installed. The installation of composer can take place in various ways depending on the operating system used. Here are the commands needed to install composer on Linux, MacOS and Windows:
2.1. Install Composer on Linux or MacOS
As I said before, to install the Zend Framework you need to install Composer first. Composer is simply typing the following command from the terminal:
curl –sS https://getcomposer.org /installer | php
In case the curl command is not available, you can use this alternative PHP command:
php –r “readfile(‘https://getcomposer.org /installer’),” | php
These instructions download and install composer by executing the instructions contained in the composer.phar file. If you want to make Composer available system-wide, and not just in the current directory, you can move the composer.phar file, downloaded earlier, to the /usr/local/bin directory:
sudo mv composer.phar /usr/local/bin/composer
Once Composer is installed, it will base all its operation on the composer.json file, present in the folder of the software project to be managed, it is possible to install the dependencies with the following command:
composer install
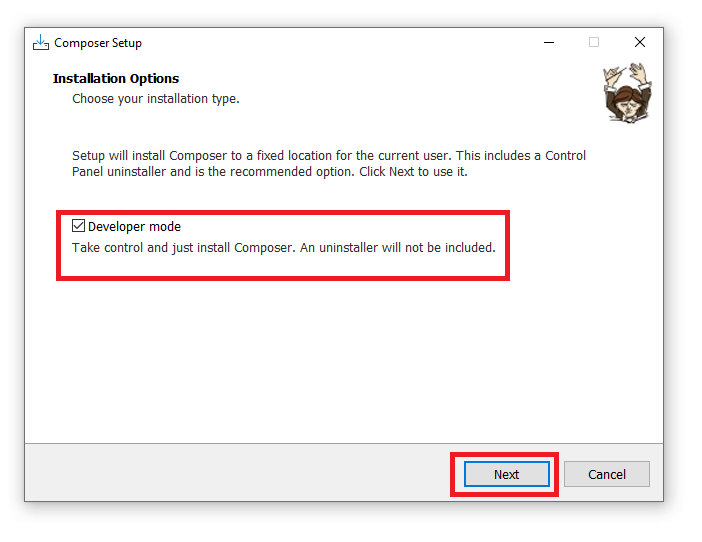
2.2. Install Composer on Windows
To install Composer on Windows, all you have to do is download the executable package by clicking on this link and then run it following the suggested wizard.
2.3. Verify Composer installation
To verify the correct installation of composer just open the terminal or command prompt and type the following command:
composer- V
2.4. Install Zend Framework
The installation of Zend requires the execution of a single command from the terminal or command prompt. The command in question is:
composer require zendframework/zendframework
This command will install all 61 required packages by updating the composer.json file. Alternatively, all Zend Framework packages can be installed individually; for example, if you only need the MVC package, you can install it with the following command:
composer require zendframework/zend-mvc
Now, you have everything you need to create your first web project with PHP and the Zend Framework.
Read more: How to Create web app with Python and Flask
3. How to create a project with the Zend Framework and PHP
Now, you need to create the folder that will contain all your web project under the web server root. Then, locate the htdocs or www folder. Which for WAMP in Windows is under this path C:\wamp\bin\apache\apachex.x.x\, while, for Linux and MacOS it is under /var/www. Now, create a folder under htdocs or www and place yourself inside it. Okay, there you have it, type this command:
composer create-project zendframework/zend-expressive-skeleton
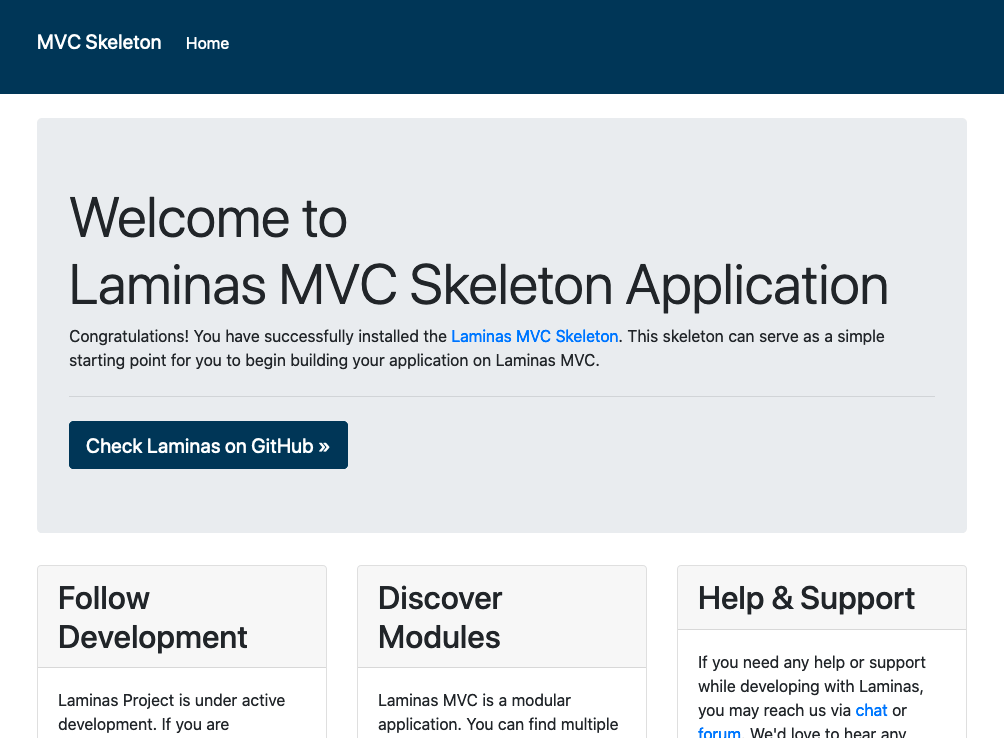
After typing this command, a series of options will appear on the screen for you to select to customize your web project with Zend. Here, choose Plates, as template engine, FastRoute, as routing system, and Woops, for application debugging. Anyway, read them carefully and select only the items that interest you. Once the installation process is complete, it will be possible to view the example application by typing the following command:
composer create-project zendframework/zend-expressive-skeleton
By opening a browser at http://localhost: 8080, you will be able to view the home page of your first web application created with the Zend Framework, as shown in the figure.
4. Hello World with the Zend Framework
The MVC paradigm uses a very particular system based on URLs. In fact, the URL of an MVC web application contains all the information to understand which action to perform (method of the Zend_Controller_Action class) and in which controller it is located. For example, the URL, http://antonio.lamorgese.it/controller1/action1/, executes the action1 of controller1. Therefore, a URL contains: the controller, the action, or the method of the controller, and any parameters to pass to the action if any.
Now, get comfortable and let’s start building your first web application with the Zend Framework. So, open the terminal and enter the directory where you want to create the project, at this point type:
composer create-project zendframework/skeleton-application helloWorldTest
As previously mentioned, during the project creation phase, you will be asked if you want a minimal installation. Answer “Yes” for now, it’s just a test application anyway. For simplicity and for the purposes of this guide, I will be using the built-in PHP CLI server. That is, PHP starting from version 5.4 has an integrated web server that you can start directly from the command line. Being a web server capable of handling only one request at a time. For this and for many other limitations, it is absolutely not suitable as a web server for production systems. To start the PHP Web Server, always from the terminal, move to the main directory of your project (helloWorldTest), and type and run:
php -S 127.0.0.1:8080
In this way, PHP will run the web server waiting for HTTP calls on the localhost address (127.0.0.1) on port 8080. To stop the web server from running, press the Ctrl-C key combination. By opening a browser at http://localhost: 8080/ you can run any PHP script in the execution folder of the PHP web server.
But back to Zend framework, open your web browser and type in the address bar this URL http: // localhost: 8080 /, you should see the welcome page of the Zend Framework Skeleton application.
Now, we will try to create a new web page called by a new action. The module.config.php file present in the module / Application / config / folder contains the settings for your web application:
return [
    'router' => [
        'routes' => [
            'home' => [
                ...
            ],
            'application' => [
                'type'    => Segment::class,
                'options' => [
                    'route'    => '/application[/:action]',
                    'defaults' => [
                        'controller'    => Controller\IndexController::class,
                        'action'        => 'index',
                    ],
                ],
            ],
        ],
    ],
You can see how, inside the module.config.php file, all the routes associated with the controller and actions are contained. But you will also have noticed that a default route has been created and consequently by calling the URL http://localhost:8080/application/ the IndexController controller and the indexAction action are invoked.
At this point you need to create another action within IndexController. You will call the desired Action to print Hello World to the screen HelloWorldAction.
class IndexController extends AbstractActionController
{
    public function indexAction()
    {
        ...
    }

    public function helloWorldAction()
    {
        return new ViewModel();
    }
}
At this point you just have to create the web page that will display the Hello World greeting. Then, go to module /Application/view/application/index/ and create the hello-world.phtml file with the following content:
<?php
   echo "Hello World !";
Note that the PHP closing tag at the end of the file has been omitted. This is because this tag often produces the classic “Header already sent” error, so it is recommended to omit it and insert a few lines of comment in its place.
After this brief digression, let’s go back to our practical example on using the Zend Framework. So, open your web browser and go to this address: http://localhost:8080/application/hello-world. Your first web application with Zend is finished, now, if you are interested in understanding in more detail how to create your first controller and juggle the various components of the Zend Framework, you can follow this invaluable video tutorial.