
6 awesome command line tools for LINUX and MAC
Do you know that to better manage a computer with Linux and MAC, from the command line, you absolutely must know these 6 fantastic tools?
di Antonio Lamorgese
When it comes to the great advantages that Linux and MAC offer, the command line tool, the so-called terminal, is always there. Actually this tool is also available on other operating systems, but not with the flexibility that the terminal offers on Linux and MAC. Both operating systems are based on Linux kernels. This means that both Linux and MAC, while sharing the same kernel, run distributions of the OS. designed separately for the two environments.
However, the two operating systems, while presenting substantial differences, have one thing in common. The command line tool called terminal. This tool allows you to manage the entire computer from a purely administrative interface. A revolutionary feature compared to Windows operating systems. For which Microsoft, despite having adopted the “command prompt” since the first versions of Windows, only recently, thanks to the introduction of “PowerShell”, has it managed to give greater impetus to the management of the operating system in a more interactive way.
The terminal, also known as the command console, is a text-based, non-graphical interface used to issue Linux and MAC commands. This is a very important tool in both systems, as it is used to make direct changes to the administrative management of the computer. Many developers use it every day to create programs, configure servers and applications, remove viruses, and even modify files through direct commands to the operating system.
Long before the development and advent of the graphical user interface (GUI), computer systems were operated on machines that only had a command line terminal. Even programs or management software were written and designed using the terminal. Therefore, many professional programmers have become accustomed to using this tool to the point that they consider it necessary for development and programming work. In fact, even many development editors, such as Visual Studio Code, integrate the terminal directly into them. So it is easier for software developers to type commands without leaving the window containing the source code. In short, the terminal can really simplify your life.
Leggi anche: Come creare un programma con Prettier e Visual Studio Code
There is good news for terminal lovers: There are dozens of command line tools, also called CLI. For the purposes of this guide we will focus on the Linux and MAC terminal and on 6 fantastic command line tools that will allow you to manage and speed up your computer in complete autonomy.
Table of contents...
1. Clean the disk of unnecessary or damaged files with rmlint
rmlint stands for remove lint. It is a very powerful tool designed to automatically locate and eliminate all unnecessary and damaged files that accumulate on the disk. Occupying space and considerably burdening the memory and the execution of active processes. With rmlint you can easily clean up your computer from old files without symbolic links that point to files that no longer exist and are therefore useless. Backup files, temporary folders, log files and unnecessary and / or damaged duplicate files are also completely removed from the hard disk partitions.
At this point I have a question for you: “Have you installed too many software on your computer and it is now too slow?” Well, if you are interested in understanding how to solve the problem, know that the lack of free space is highly penalizing for an operating system and, in any case, it is always very difficult to understand what takes up space on your hard disk and what is slowing down your computer. And it is precisely in these cases that rmlint proves to be an effective tool. Just run rmlint and the command will automatically detect what is taking up disk space by removing any files you no longer need.
Read more: Web app development with WordPress, PHP and CodeLess Framework.
Also, if your hard drive is more than a couple of years old, chances are it has collected a lot of junk files. That is, files relating to old installations that the system has not run for a long time. As these files become obsolete, they are deleted and moved elsewhere on the system to make room for more recent data. Unfortunately, in some cases these deleted files remain intact in their original locations. Rmlint is a tool that allows you to find and remove these files, and others that are damaged or even empty, from your computer.
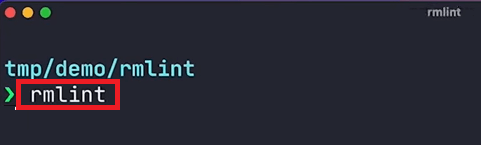
To run rmlint, both on linux and on MAC, just open the terminal and type the command rmlint followed by pressing the ENTER key.
2. Copy and synchronize files and directories with rsync
Rsync is a command line tool for Unix like operating systems. Rsync can copy and synchronize files from one directory to another using its proprietary protocol. To synchronize files between two directories, two parameters must be passed to the rsync command. The source directory is specified as the first parameter and the destination directory must be specified as the second parameter on the command line.
rsync is a great tool for keeping directory structures synchronized. For this reason it is very useful for making backups and safety copies. I recently had to copy over 12,000 files from one remote server to another. Copying these files via FTP, in this case, was not an option to consider as the transfer would take days or even weeks. Using rsync, scheduled with a cronjob, proved to be the most efficient method I could find.
Over the last few years I have worked with many developers and one of the problems that comes up all the time is how to make a backup copy of the shared source code repository. It is surprisingly difficult to get developers to use versioning systems like Git or SubVersion. These versioning systems would solve the problem very well by making, at each commit, a sort of copy of the sources divided by version. Instead, the trend is to manually copy files after each change in the source code. So it takes some time to copy and create reliable backups. By using Rsync, you can be sure of keeping your backup copies in sync while faithfully getting the job done smoothly.
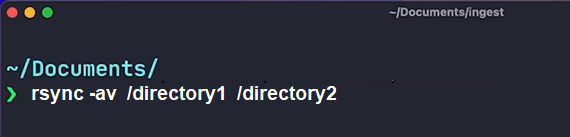
For example, to copy directory1 to directory2, synchronizing their contents, just open the terminal and type the command rsync -av /directory1 /directory2 followed by pressing the ENTER key. Rsync will take care of the entire process, always maintaining a reliable and safe copy of your data.
“If you are a Windows system user, know that you can use the Robocopy command as an alternative to the rsync command to perform the same operation.“
Read more: Turn Any Text into Video With Just A Few Clicks
3. How to manage your files in the cloud with rclone
Until now, to access files on the cloud, you had to access them via a browser or a dedicated application. It was not yet possible to easily move or sync them directly between your computer and mobile devices. A cloud content management service like rclone has the power to change things, giving you full control over your files and allowing you to sync and copy them from a cloud storage provider (like Google Drive, Amazon S3, etc …) to a other (like Dropbox) all by running a simple terminal command.
In short, through rclone you can synchronize files and directories to and from multiple cloud storage providers. Later I will show you, with a simple example, how to use rclone to back up an entire collection of files and folders to the Cloud and manage these files directly from the terminal.
Although rclone is a command line tool, it is extremely easy to use. It supports Amazon Drive, Google Drive, Microsoft OneDrive and Dropbox. If you want to access your files stored on one of the aforementioned providers or from another remote computer, here are the steps to follow:
a) Install Rclone on your computer (if it is not already installed).
b) Make sure you have the latest version of Python installed, including its pip package manager.
c) Obtain the access token and secret ID from your Cloud provider’s page. For example if you use Google Drive, as a Cloud Provider, you can follow this guide to get the secret ID and access ID token.
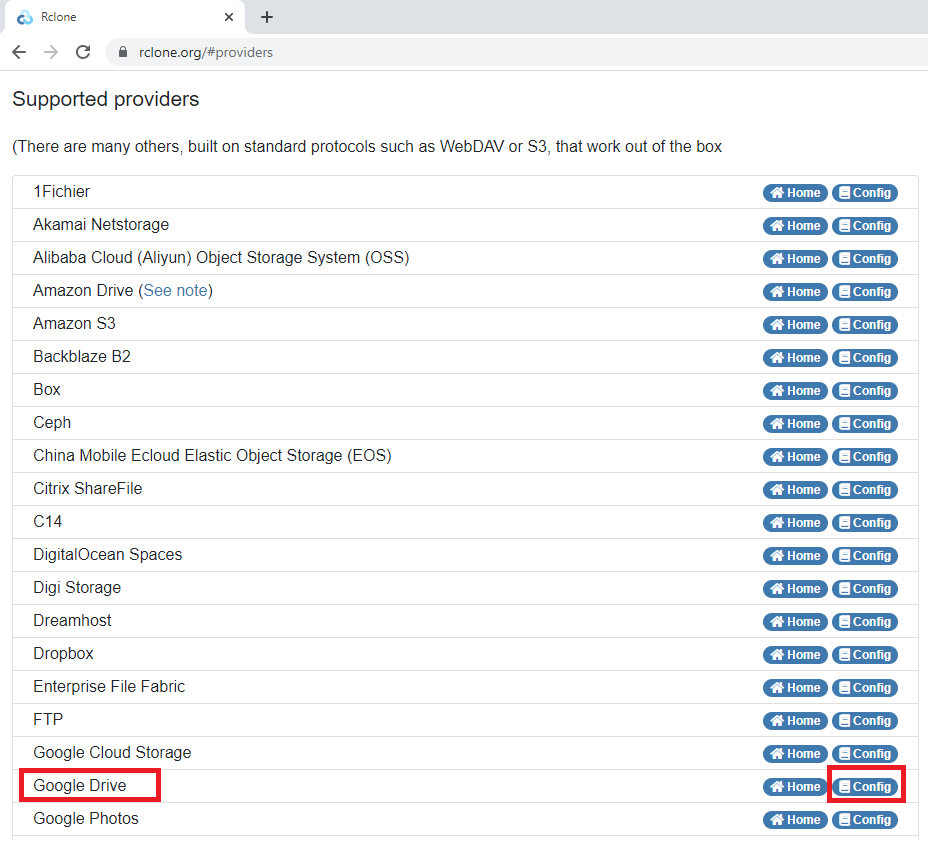
d) Type the rclone config command from the command terminal and enter all the information when prompted. To find out which providers are supported and how to configure access with rclone config, I suggest you take a look at this page. From this web page, by clicking on the config button relating to the provider concerned, you can obtain all the information for a correct rclone configuration to be carried out with the rclone config command.
Once you have done all the operations indicated in the previous points, you can run this command on your local computer to copy/backup your files to the cloud.
rclone copy source:sourcepath dest:destpath
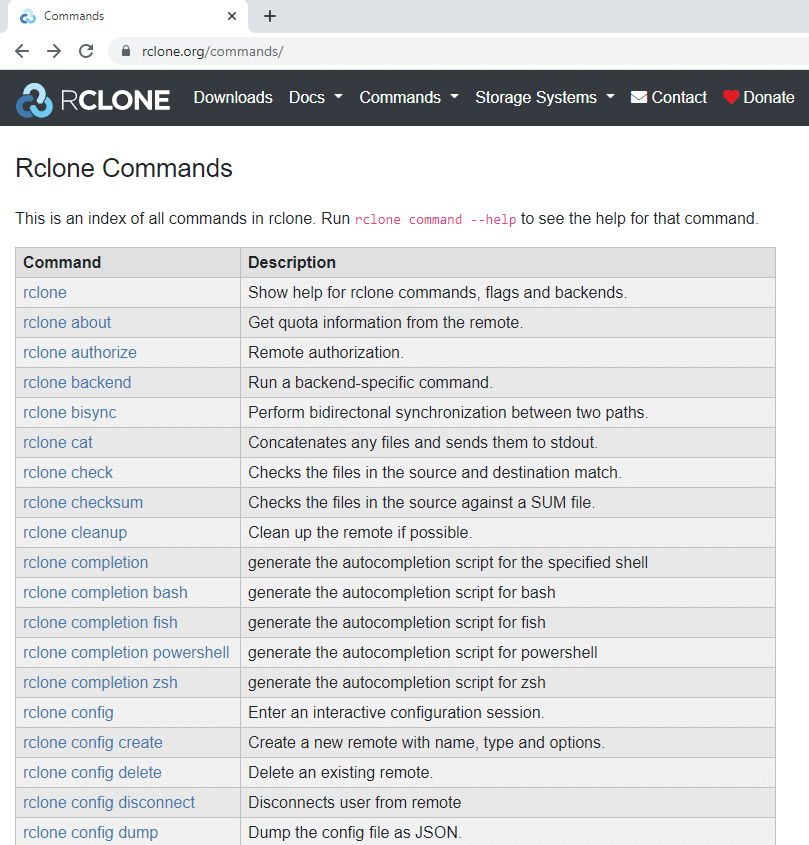
It is my duty to point out that rclone is accompanied by an infinite number of commands that you can use to perform any file operation to and from a cloud provider. At this address you can see a detailed list of each command.
Furthermore, by typing the command rclone command –help, from the terminal, the system will display the list of commands available in the terminal window of both Linux and MAC. In the figure part of the commands available with rclone.
Well, you will have understood how important it is to know how to use and take full advantage of this command. And to dispel any doubts I suggest you follow this short video tutorial where you will be able to understand how rclone is used in the professional field.
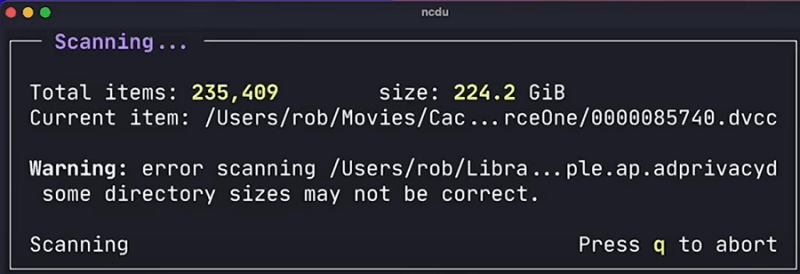
4. Analyze disk usage with ncdu
Disk space has always been a valuable asset. It is very easy to ignore the impact that a bad use of disk space can have on the daily operations carried out on the computer. While you may not like analyzing data and resources with the use of command line tools, these are a great way to measure system performance and identify potential issues. In short, the optimization of hard disk space is still an excellent practice to be performed periodically to keep your computer in excellent condition.
One of the most important tasks when optimizing your hard drive is keeping track of how the disk space is being used. Many people, myself included, start with graphical disk usage visualization and management tools, such as the Gnome Disk Usage Analyzer. While they are excellent tools, I believe that the use of command line tools is the best way to get an immediate account of how disk space is managed. All Unix-like systems, such as Linux and MAC, have the ncdu utility available to manage and monitor the use of the hard disk and the entire filesystem.
ÈThe ncdu tool may not be available on some Linux and MAC distributions. In this case it can be installed very easily. However, both on Linux and on MAC software installation follows different rules. Below is the command for Linux and the command for MAC to run to install ncdu on both systems.
a) Installing ncdu on Linux:
sudo apt install ncdu
b) Installing ncdu on MAC:
brew install ncdu
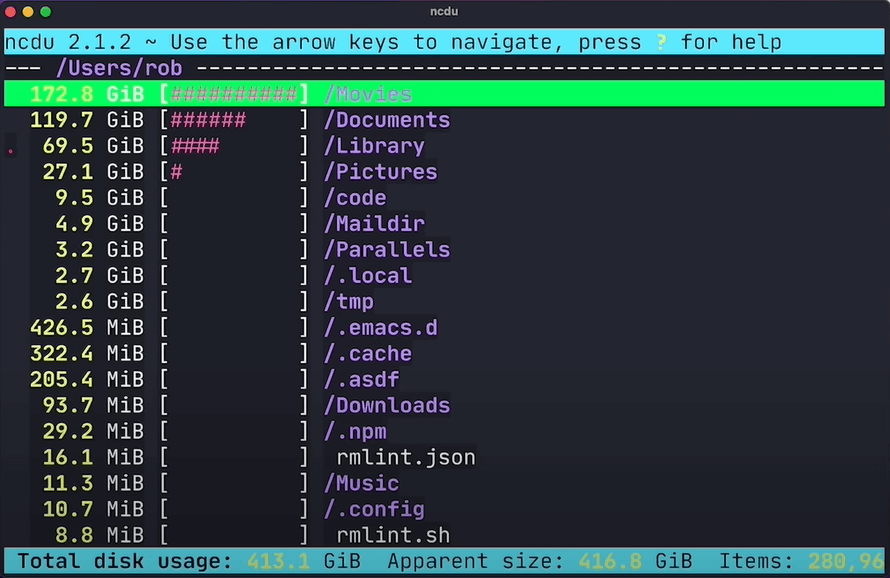
Now that ncdu is available on your computer by running the command from the terminal, the system will first scan the entire filesystem and then show a list of folders and the space occupied by each.
Using the arrow keys, you can select the folder to be fed to ncdu and indicate it as a starting point for the analysis. As a user of Unix-like systems, you will know that the var folder is always an excellent starting point for analysis. This folder contains many dpkg files which are used by the system to install and uninstall software. Many of these files may be deleted as they are no longer needed. In this regard, just go to one of these files, press the “d” key, and confirm the deletion by pressing the “y” key. By doing this, you can free up quite a bit of disk space.
In this video tutorial you will be able to see in detail how to monitor and free up disk space using ncdu in combination with df.
5. Manage processes and memory with btop
Btop is a performance monitoring and tuning tool for the whole family of UNIX Like operating systems. BTop provides an interface similar to the Top tool through which users can observe, filter and manage processes, activities and RAM memory. The tool utilizes all of the latest kernel enhancements, which provide more advanced resource management and diagnostics tools. It will also allow you to see in detail how the computer is managing the resources at its disposal.
As I told you earlier, bTop is a handy command line tool that displays real-time information about the processes and activities running on your computer. As a result, it’s very easy to spot which processes are consuming the most memory, slowing down your computer. Now I will show you how to monitor and manage computer memory and processes with btop.
Once you run the btop command, from the command line, the system will display a window containing a lot of useful information. In this window you will have the opportunity to understand how much RAM the system is using, the excessive use of the disk and what is very important the active processes and the resources that each process uses.
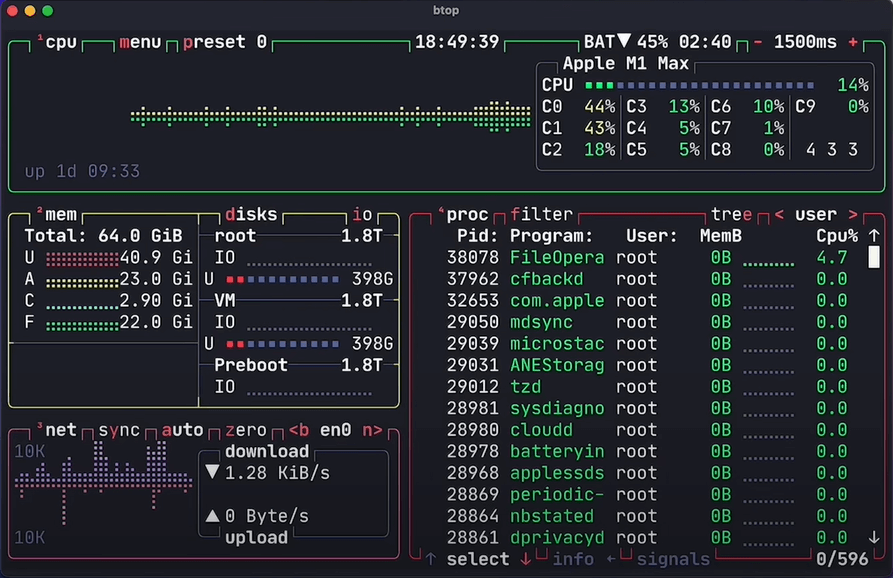
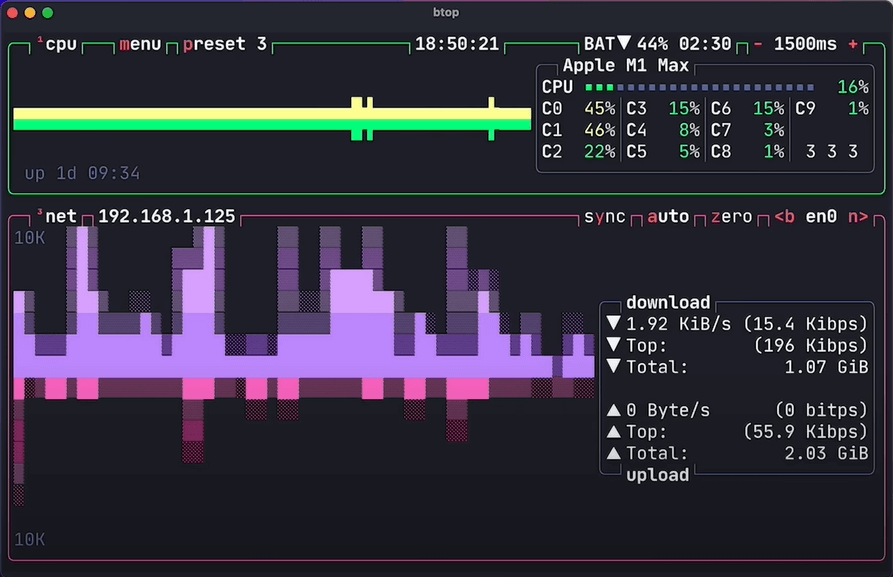
It is not uncommon for some process to exploit the computer’s memory more than it should, slowing down and penalizing the performance of the entire system. At this point, through btop, you can select the process in question and close it without many pretensions. Another feature of btop concerns the monitoring of traffic managed by the network card. Also in this case, btop is of fundamental importance allowing you to understand if the network card is affected by anomalous traffic.
6. How to send custom notifications with ntfy
Ntfy is a notification automation tool for Linux and Mac systems capable of reporting events directly to the operating system. With ntfy you can be informed about the progress of the execution of long commands, or receive a notification when specific events occur, such as the completion of a long-running background job or the modification / deletion of a specific file. If you feel frustrated by the default notification system and want to implement and customize this notification management system, you can take a look at the official ntfy page by clicking here.
Ntfy is a multi-platform, flexible tool that runs entirely in the background on the local computer. Ntfy will regularly check for any commands scheduled to run. And if one of these commands is executed at a specific time, ntfy triggers an event that will send a scheduled notification to the operating system for you.
For example, to send the text “hello” notification to your operating system you just have to open the terminal and type the command ntfy send hello. Subsequently, after pressing the ENTER key, the system will receive the notification and display it using its notification display system. So your computer will display this message:

earlier I told you about sending and receiving notifications upon completion of a command. Now, I’ll show you, how to send a notification about the success or failure of the execution of another command in combination with ntfy. For example, with this command the system after removing the “test” file will send the notification “file deleted”, or “file not found” in case of failure.
rm test && ntfy send file deleted || ntfy send file not found
Since the “test” file does not exist, the system will receive the notification “file not found”. Using ntfy as an alternative notification management system will allow you to manage the execution of demanding processes in a more professional way. In any case, by clicking on this link you can consult the official ntfy page, where you can learn how to send notifications to your smartphone as well.
Read more: How to create a web application with PHP and Zend Framework