How to Install Windows 10 on Raspberry Pi 4 e Pi 3
Do you think installing and starting windows 10 on raspberry is feasible? Yes, apparently it is possible.
di Antonio Lamorgese
Do you think installing and starting Windows 10 on Raspberry is feasible? Yes, apparently it is possible, I tried it and it worked, to my great satisfaction. Now I will show you all the steps necessary to do this.
In fact, but not for long, all the material to carry out the transaction in title in total safety is present on the net. The developers finally installed the ARM-optimized version of Windows 10 on the Raspberry Pi 4, after some people managed to get it to work on the Raspberry Pi 3 in the first half of 2019 as well.
Table of contents...
1. Windows IoT Core vs Windows 10 ARM
Raspberry Pi 4 and Pi 3 officially support the IoT Core version of Windows 10, which is not the same version of Windows 10, so to speak, the one that runs on a desktop PC, but is a smaller version for low-power computers.
The ARM version of windows 10, which we will install on Raspberry, is a normal windows version, as we all know it, but with only the necessary services active when the operating system starts, but I repeat that it is a normal windows installation with all the features to which windows in the meantime has accustomed us.

There is a huge difference between the Iot version of windows and a version compiled for ARM, but we see some differences between these two versions. For example, Windows 10 IoT Core won’t let you run traditional Win32 apps or launch on the desktop. The IoT allows you to run a single UWP app at a time, and the real purpose of the operating system on the Raspberryi is to run small applications, designed for tiny computer boards.
Fortunately, there is a new guide to getting Windows 10 running on ARM on Pi 3 B + and Pi 4B using an unsupported technical preview build. Unlike IoT, Windows 10 ARM is an ARM-focused OS redefinition, which comes with a traditional desktop and Win32 app support via emulation.
This means that by installing an ARM version of windows on Raspberry, you will be able to run any type of application that normally runs on traditional 32 and 64 bit versions of windows.
2. Download the necessary software
Before proceeding with the installation of the operating system, we must obtain everything necessary to continue. Then you will find listed below all the software needed to install Windows 10 on Raspberry Pi4 and 3.
2.1 Download UEFI firmware
Download the UEFI firmware for Pi4 from here and for Pi3 from here, for Pi4 click on the RPi4_UEFI_Firmware_v1.29.zip link, while for Pi3 on the RPi3_UEFI_Firmware_v1.29.zip link and extract it to a FAT32 formatted MicroSD card.
2.2 Download Windows 10 ARM
Download Windows 10 ARM64 Build from here. Click on the ARM64 button relating to the “Latest Public Release build”, never choose the cumulative version and if the system shows you multiple versions of windows 10, choose only one you like between Home and Pro, and follow all the suggested steps, at the end procedure you will download a zip file, with three batch files inside. If you are using windows on your pc, run the one with the cmd extension.
2.3 Download WOR “Windows on Raspberry”
Download “Windows on Raspberry” from here. This software will allow you to install the previously downloaded Build on the MicroSD that you will insert into the Raspberry.
After downloading these files, you need to carefully follow the technical steps that I will now give you.
3. Installing the Windows 10 ARM ISO on MicroSD
Let’s go back to the ISO you downloaded earlier for a moment. In the sources folder, there is a file: install.wim, remember this file and the path to reach it, it will be very useful when you are asked.
As a first step you have to mount the ISO, the operation is very simple click with the right mouse button on the ISO and select the mount context menu item. In the explorer you will find another device with all the ISO files mounted, just as if you were reading the contents of a DVD from the optical drive.
Now extract and start, with administrator rights, the “Windows on Raspberry” program, downloaded previously, by clicking on the executable WOR.exe in the extracted folder.
Well a little more patience and we are almost done. Once the WOR program, which stands for “Windows On Raspberry”, is open, the window will be shown as shown in the image below:
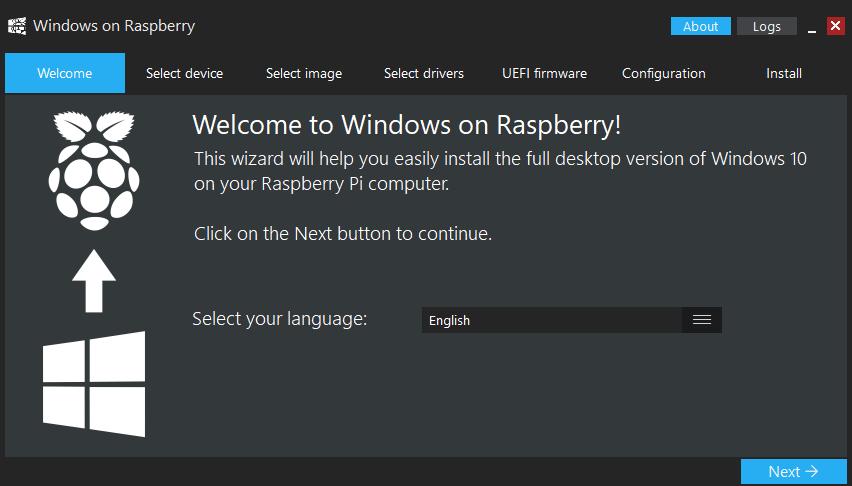
In the “welcome” tab, all you have to do is select the language and click Next.
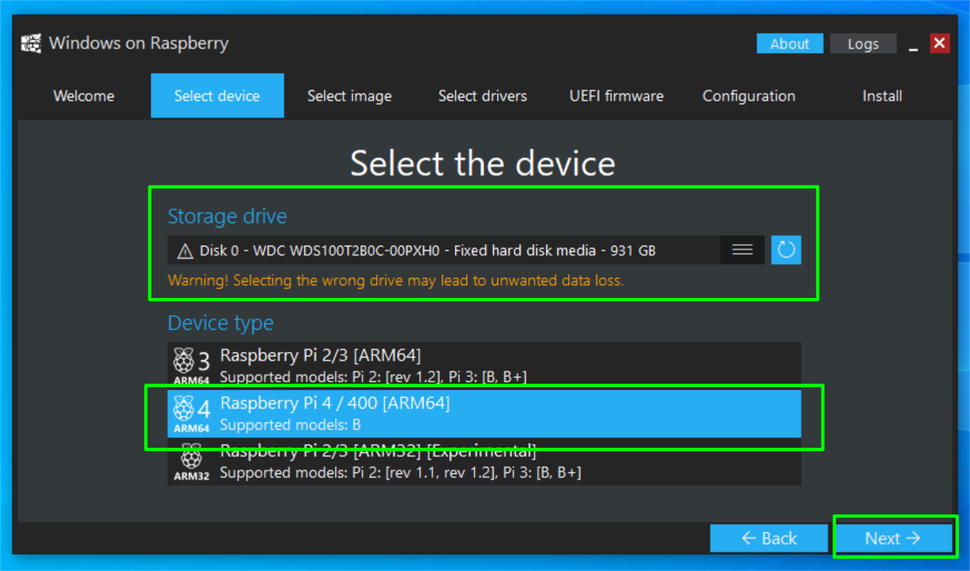
In the second “Select device” tab you must select the Raspberry Pi4 or Pi3, depending on your needs, also select the MicroSD and click Next.
It’s time to select our install.wim file, remember? Then click on the file selection button, present next to the wording “select image” and go to the resource created at the ISO mount and reach the sources folder, double click on the install.wim file and click on the Next button again.

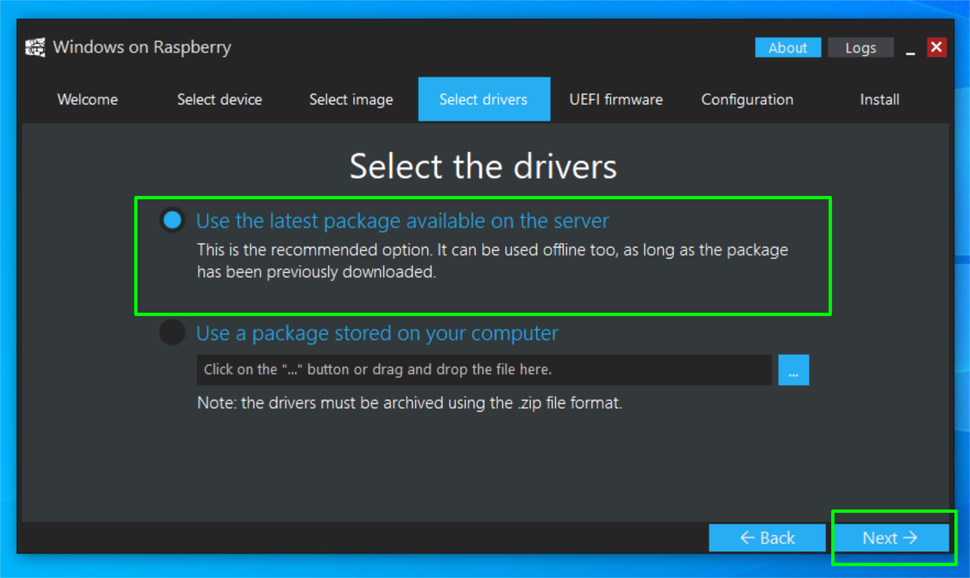
At the request to load the drivers, check the item “get the latest drivers from the internet”, click on Next again.
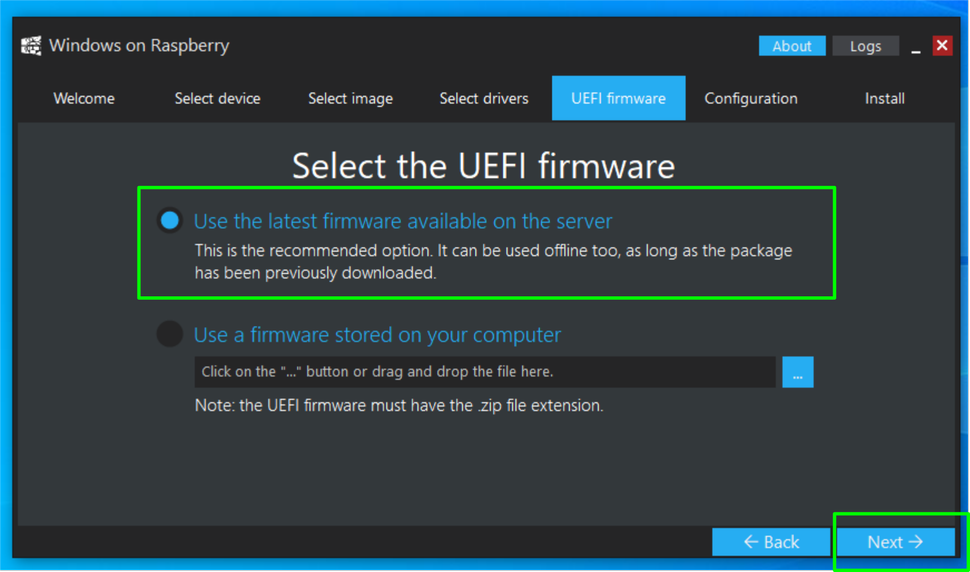
The time has come to specify the updated firmware appropriate to the type of Raspberry in your possession. Among the downloaded files, you will remember that you have downloaded two zip files one for the Pi4 and one for the Pi3, the file name is more or less in this form: RPi4_UEFI_Firmware… .zip or RPi3_UEFI_Firmware… .zip, logically you will feed it the appropriate zip file.
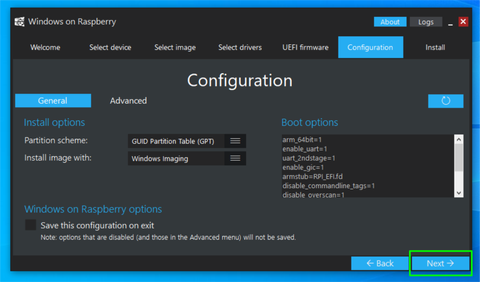
In the “Configuration” tab, make sure MBR is selected as the boot type and click Next again and then Install. To successfully conclude the procedure, there must be an internet connection for the entire ISO installation phase.
At the end of the entire installation procedure and only after the display of the message, which will indicate the correct transfer of the operating system to MicroSD, you can disconnect the MicroSD from the PC and insert it into the Raspberry. Connect the keyboard, mouse, monitor and power supply to the Raspberry and wait for the BIOS to load.
It is necessary, when starting the Raspberry, to click on esc, and reach the menu item change order boot, and specify the SD / MMC as the first loading device of the operating system. Another very useful advice is to try to overclock the Raspberry, selecting the max item in correspondence with what is indicated on the RPI Configuration page.
At this point, exit the BIOS and click on the continue link, present on the BIOS home page, and wait for the correct start of the windows 10 installation phase.
Read also: Controlling Raspberry Pi GPIO pins from script bash
4. Conclusions
Windows on ARM performs better on the Raspberry Pi 4 than its predecessor, but the system continues to drop frames when watching 1080p video or streaming Netflix using the Windows Store app. Graphics-intensive activities are incredibly slow, and some apps may crash if you switch between them. Logically we are talking about an intensive use of the operating system, it is worth remembering that the applications that we will run on Raspberry must be low impact applications for the operating system.
The developers are also bringing Windows 10 to ARM on Android phones such as Galaxy S8, OnePlus 6, OnePlus 5, and Xiaomi Mi Mix.