Web app development with WordPress, PHP and CodeLess Framework.
How many times have you found yourself in the condition of developing web apps and not knowing where to start? Now you can.
di Antonio Lamorgese
How many times have you found yourself in the condition of web app development and not knowing where to start? Well I think more than once. From today you will have the possibility, thanks to PhpCodeWizard and WordPress, to create a CodeLess web application for data management with PHP and MySQL starting from a completely free framework ready and perfectly integrable in WordPress, without writing a single line of code.
I’m talking about the new frontier of web applications, that is, applications designed using the so-called CodeLess platforms and Codeless programming.
To put this magic into action, we need an active WordPress installation. If you have a web domain with WordPress installed, you can skip reading the first paragraph, if you do not have a web domain available you can download and install WordPress locally on your PC and try the extraordinary features of PhpCodeWizard.
Table of contents...
1. Download and install WordPress locally
Installing WordPress locally is a simpler operation than you can imagine, most likely you have already tried this experience, however, follow this video tutorial that will guide you, step-by-step, in installing WordPress locally, that is, you will transform your computer into a real web server.
You should also know that it is possible to install WordPress using a very useful and currently very used tool. The tool in question is called Local by FlyWheel.
Through this very simple software you can download and install the web server with WordPress already configured and ready to work. By following this video tutorial you will be able to see how to install WordPress with the help of Local by FlyWheel.
2. Download and install PhpCodeWizard in WordPress
Preparing scripts, fully functional and free of any errors for accessing and managing a MySQL database is not at all easy. The hours of work that an experienced developer spends on such management
For this reason I decided to develop PhpCodeWizard, a free framework, ready and tested, where the only setting to do is the one relating to the connection parameters to your MySQL database. Everything else is developed in PhpCodeWizard, therefore, you don’t have to worry about anything other than integrating the package into WordPress with a simple operation.
Now, let’s go one step at a time. Download PhpCodeWizard from this link, then unzip the framework and copy it in the directory of the active WordPress theme according to the following indications:
To do this you need to evaluate two conditions:
a) WordPress installed on the internet
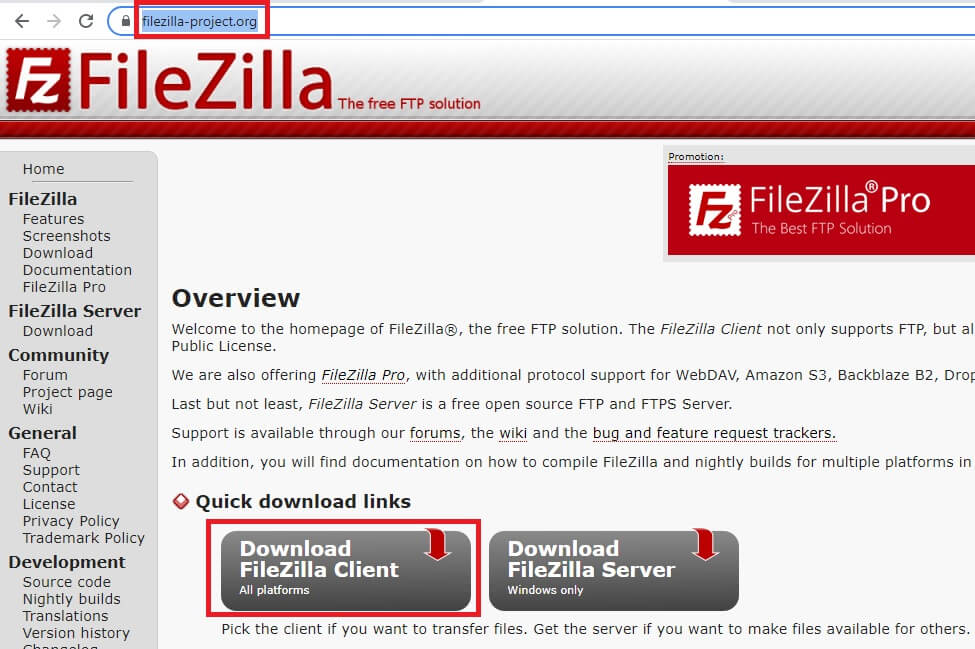
In this case you have to download an FTP client, such as FileZilla, by accessing this web page and making sure to download the client version of FileZilla.
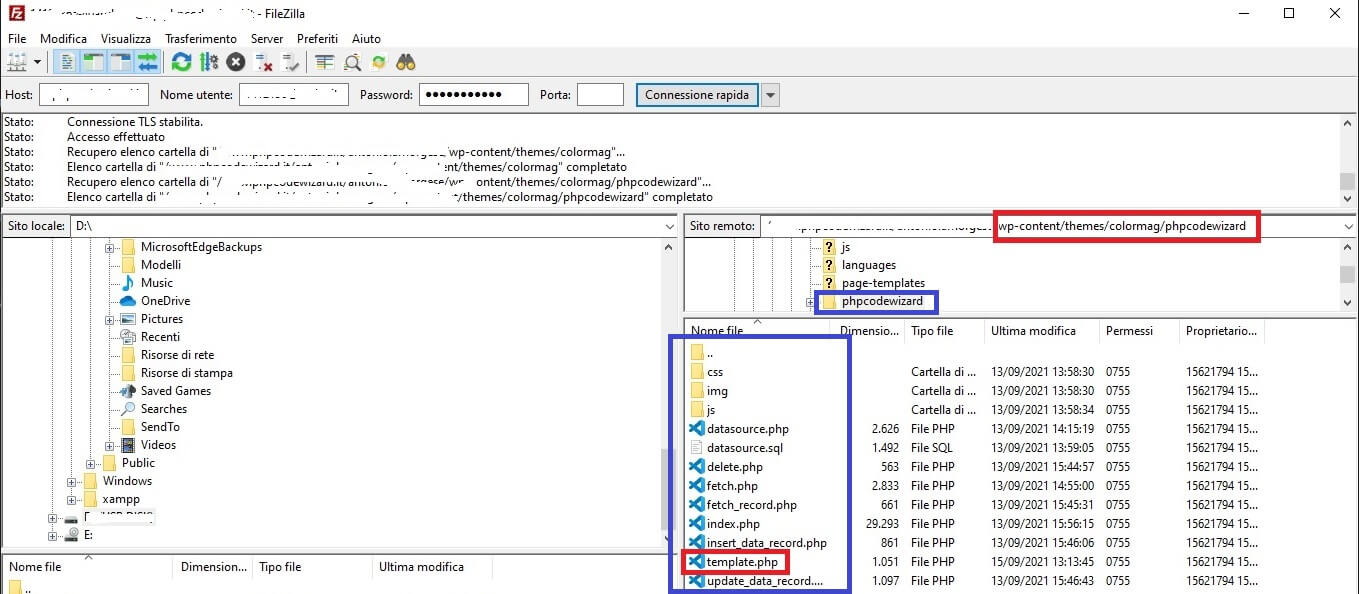
At this point, all you have to do is start FileZilla and access the root of your WordPress site by typing the login credentials requested by the FTP client. Now, all you have to do is reach the directory of the active theme and copy PhpCodeWizard, previously unzipped, into the folder highlighted in the figure:
b) b) WordPress installed locally on the computer
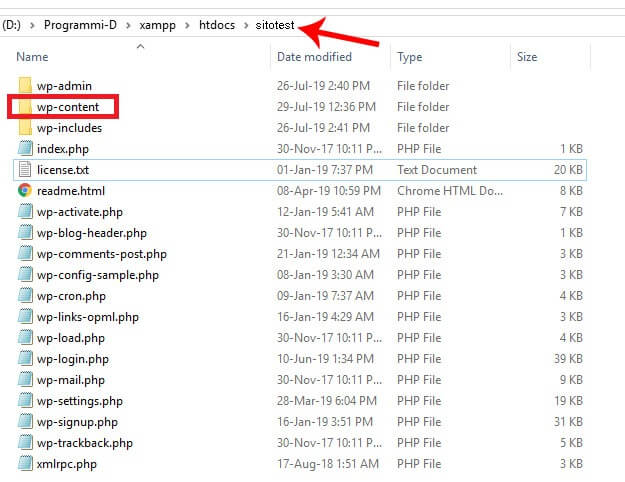
In this case it is not necessary to download an FTP client, once you have installed the web server and installed WordPress you have to reach the path of the active theme, through my computer, which is usually located under the www or htdocs folder of the web server.
3. Create the child theme of the active theme
At this point, you need to access the WordPress dashboard, ie its administration page, and install the “Orbisius Child Theme Creator” plugin. This free plugin will allow you to create the child theme of the active one, that is, PhpCodeWizard should not be copied under the main active theme folder, but in the child theme folder. In such a way that when the parent theme is updated, as requested by its developers, you will not lose its content and consequently also the contents of the PhpCodeWizard folder.
The child theme will allow you to keep unaltered all the settings you make nice PhpCodeWizard configuration file.
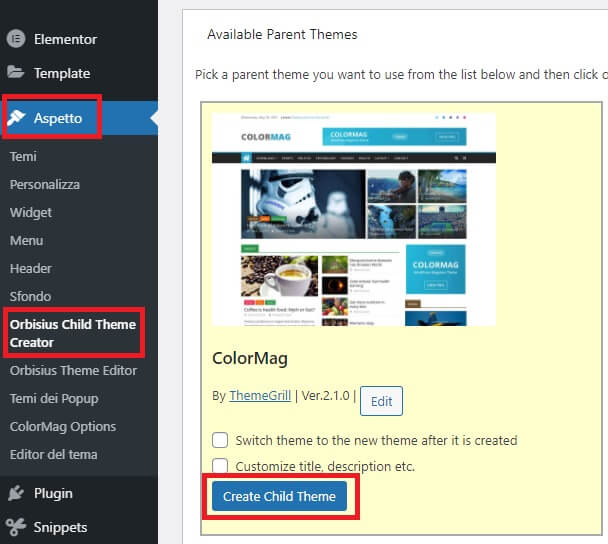
After installing the “Orbisius Child Theme Creator” plugin, again from the WordPress Dashboard, click on Themes-> Orbisius Child Theme Creator and click on the Create Child Theme button located in the tab relating to the parent theme.
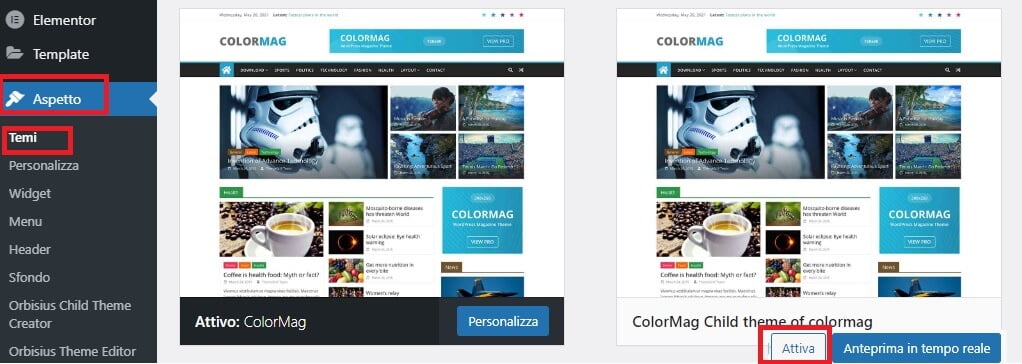
Now, among the installed themes you will also find the child theme of the active one. You just have to activate it by clicking on the Activate button.
From now on, the child theme will be the active theme that has inherited all the functionality of the parent theme. At this point, all you have to do is go to the directory of the active child theme and copy the previously unzipped PhpCodeWizard into this folder:
../wp-content/themes/NOME-TEMA-CHILD-ATTIVO/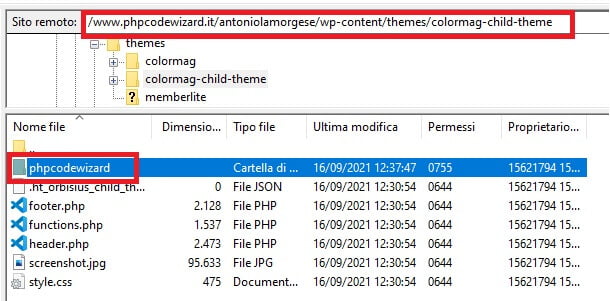
4. Set up the phpcodewizard datasource
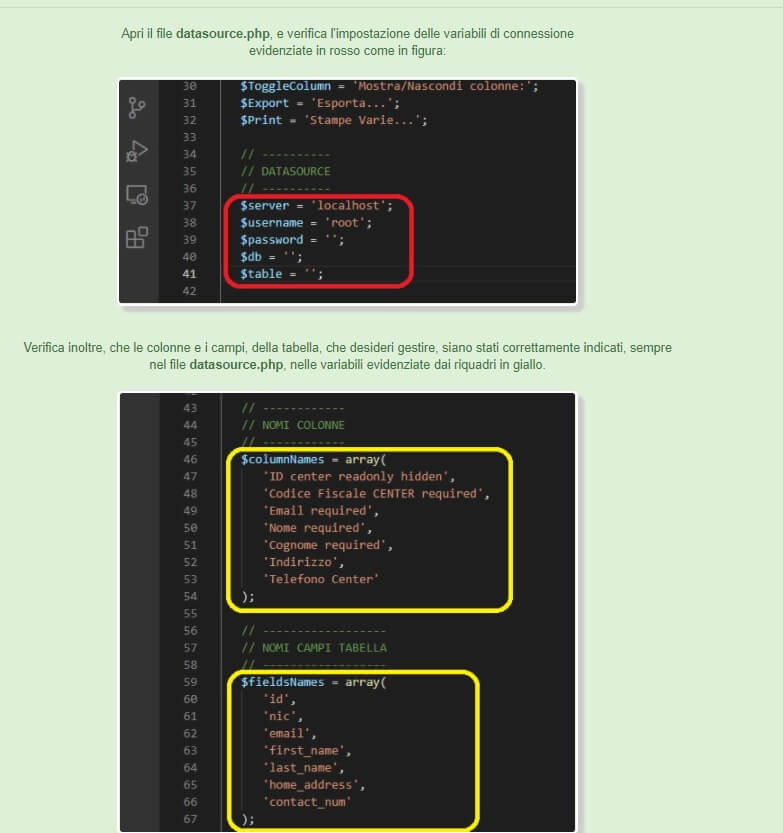
At this point, whether WordPress was installed on a web domain or installed locally on your PC, you must modify, with the help of a text editor, such as notepad, the datasource.php file in the PhpCodeWizard folder installed in the active WordPress theme.
In this file you have to modify, as shown and suggested in the figure, the connection parameters to your database and some other additional parameters present in the file itself.
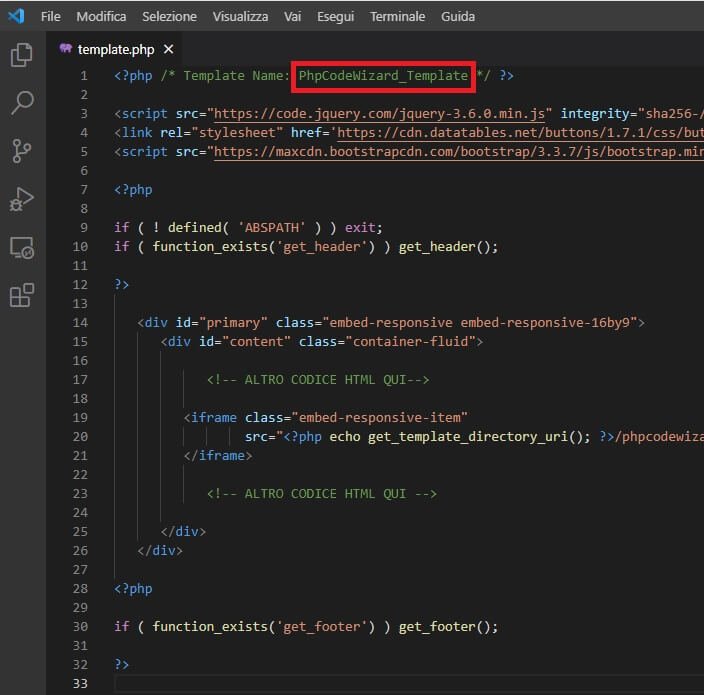
5. Specifies the name of the template for WordPress
At this point, there is still one more customization left to do in PhpCodeWizard. That is, you must modify the template.php file, present in the PhpCodeWizard folder exactly like the datasource.php file and indicate the name, of your choice, to be given to the template and indicated in the red box:
6. Set PhpCodeWizard as the page template
Now, integrating PhpCodeWizard into WordPress is a breeze. All you have to do is log into the WordPress administration page and create a new page. The only thing necessary to do is to give the newly created page a title and select, as shown in the figure, the template just specified in the template.php file.
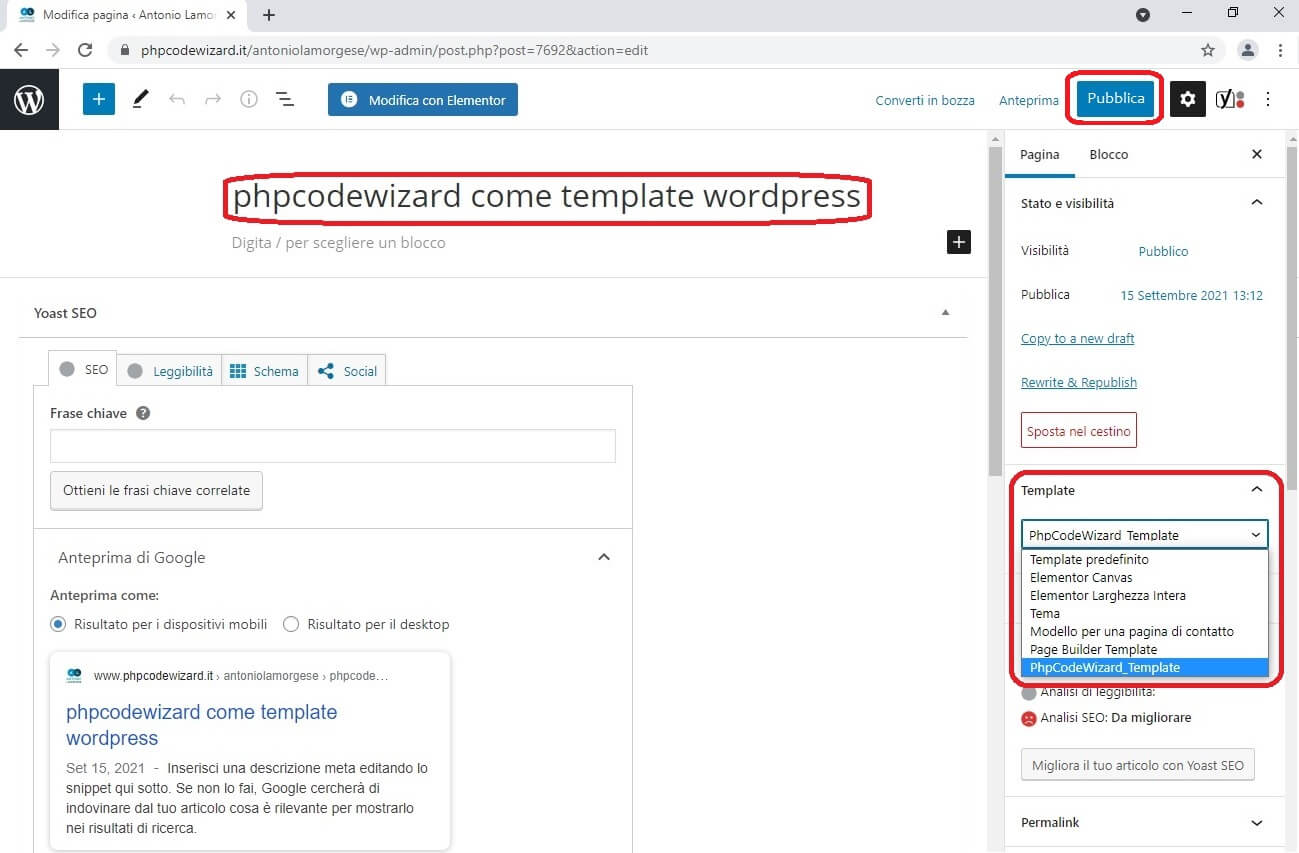
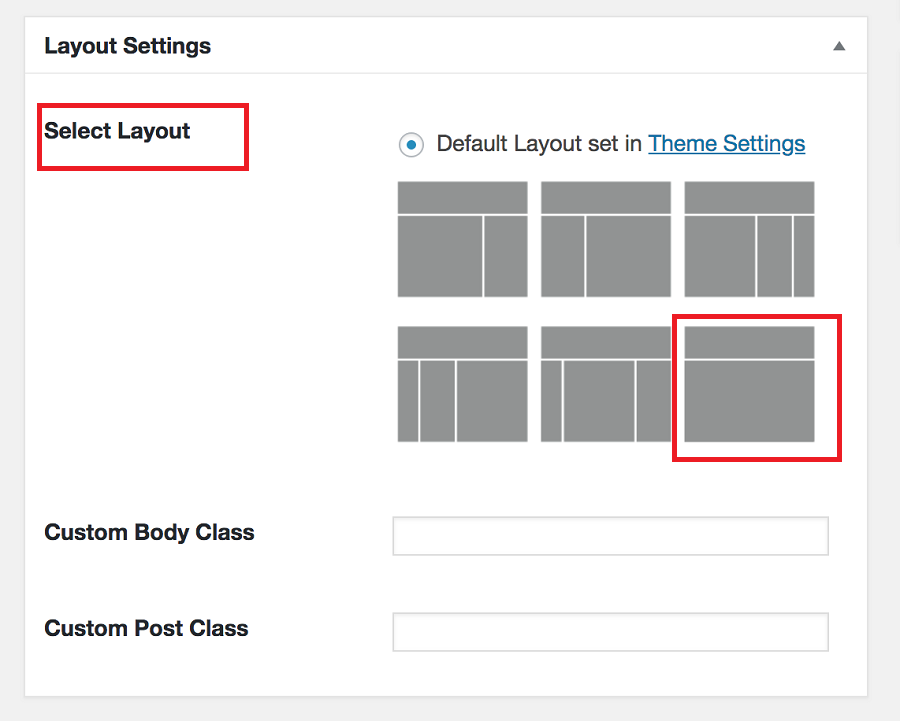
In any case, it is always better to set a full-width page layout for WordPress by clicking on the icon at the bottom of the page.
Now you just have to click on the Publish button and copy the published link by clicking on the Copy Link button displayed by WordPress once the page is published.
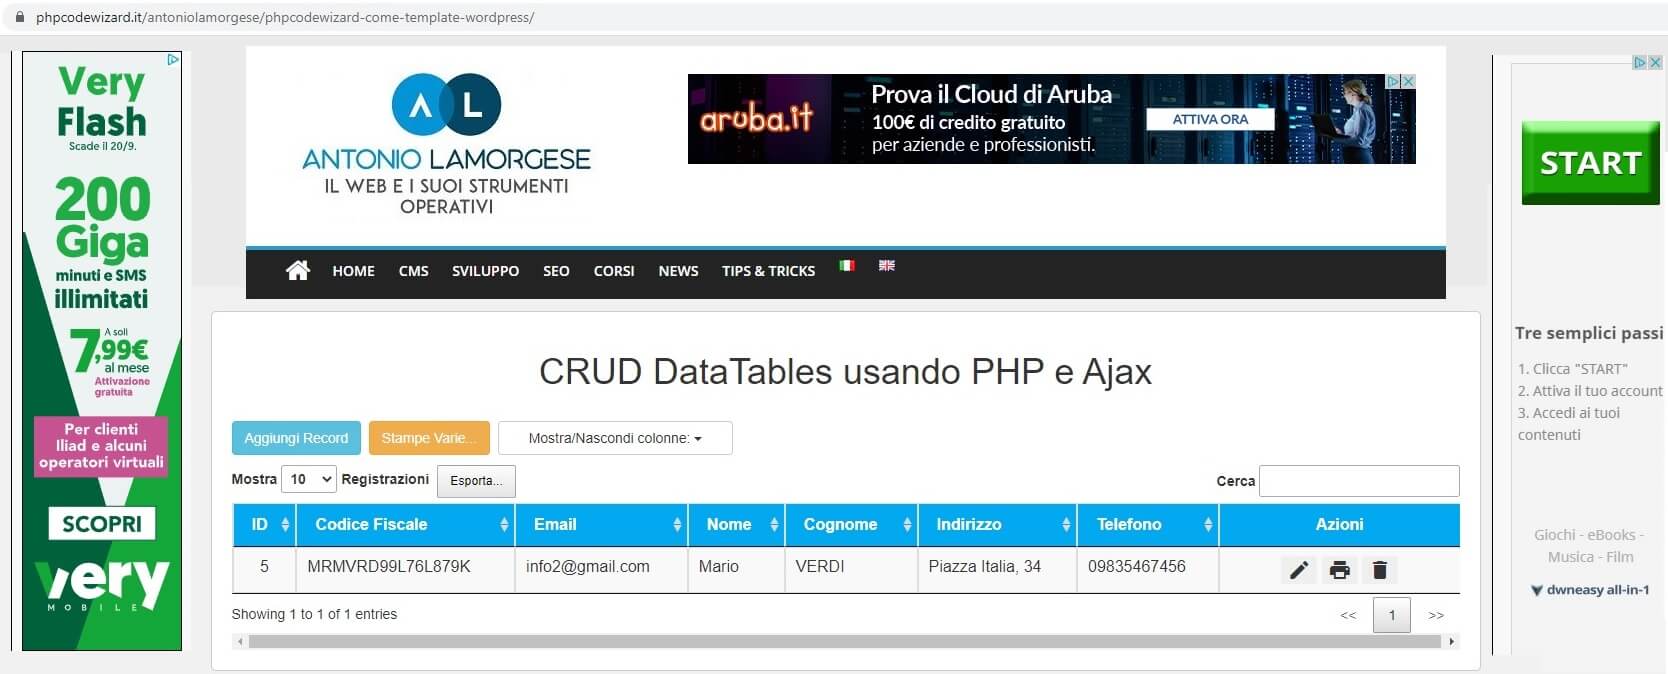
7. Verify template execution
Open your favorite browser, copy and paste the link into the browser address box and hit enter. You should see PhpCodeWizard in action integrated into WordPress and fully functional.
Having PhpCodeWizard integrated into WordPress means that you can install all the plugins, available for free, for managing template authentication through the management of roles and privileges. Just like the User Role Editor plugin does.
READ MORE: How to make an Android app without coding
8. Conclusion
Designing web applications using WordPress, one of the most popular CMS in the world, will give you the opportunity to integrate important features into your web application, choosing from over 5000 free plugins made available by the community.
Not only that, you can take advantage of all the security management offered by WordPress, focusing only on customizing and integrating PhpCodeWizard within it.