
How to create a software installation package
Interested in distributing your project by creating a software installation package? In this guide I will explain how to do it.
di Antonio Lamorgese
After completing the long software development phase, or, if you have a folder containing many important files for your work, know that you can create a software installation package self-extracting and self-installing . I’m talking about the classic “Setup.exe“ file. The process itself is very simple and fast. The only aspect to take into account is that this procedure only works on Windows. Another important aspect is that you don’t need to install anything on your computer. Windows already comes with a program that has been specifically designed to create self-extracting and self-installing packages without any effort on your part.
This software takes the name of “iexpress.exe“ and, as I have already mentioned, is used to create installation packages for Windows. It is available in all versions of Windows, including Server versions. It is a stand-alone executable, and is stored in the “Windows\System32\” folder. In the following paragraphs I will show you step-by-step how to create installation packages for Windows.
Table of contents...
1. How to run iexpress
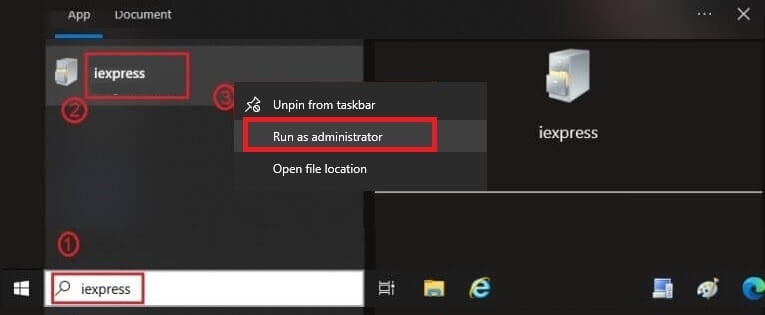
Like any type of executable, even iexpress can be recalled and executed by typing “iexpress“ in the text box relating to the software to search for. The advice I can give you is that it is better to run “iexpress“ with administrative rights. Then, type the command “iexpress“ and hit the ENTER key.
2. Locate the folder containing your project files
Before proceeding with the creation of the installation package, you should take a last look, to check and verify, the folder containing the files of your software project or, in any case, the folder you wish to process. Keep in mind that this process does not only refer to folders containing software projects, but can be applied to all those folders that you wish to distribute and make self-installing on other computers as well. In addition to all this, “iexpress“ can be useful for creating self-extracting backups of folders that you can use in case your computer crashes. In that case consider that there is the possibility to password protect this type of backup with “Androsa File Protector”.
Read more: Make money online with Guest Posting
Now, after checking and verifying the folder in question, you will see how to create your first installation package with “iexpress”.
3. Create new software installation package
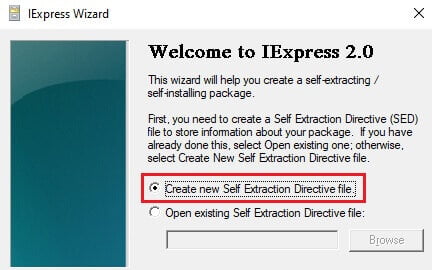
Immediately after running the “iexpress“command as an administrator, the software, from its welcome page, offers you two solutions. If you choose the first option, i.e. “Create new self Extraction Directive File”, you will be able to create your package for the first time. Mind, if you choose the second option, that is “Open existing self Extraction Directive File”, you will be able to recreate your installation package, in case of modification of the files contained within it. Now, since you have to create an installation package from scratch, you have to tick the first item, ie “Create new self Extraction Directive File“ and click on the “Next“ button.
3.1. Set the Installation Package Options
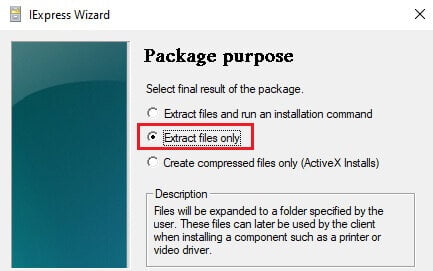
In this second screen, “iexpress”, will offer you to choose between three options that will allow you to set the final result of the package itself. Here too, the options leave no room for doubt. Anyway, you choose the item “Extract file only”. That is, when you run the created executable, “iexpress ”, it will extract the files without executing any commands after the file extraction stage. Once this is done, click on the “Next“ button.
3.2. Choose a title for the installation procedure dialog box
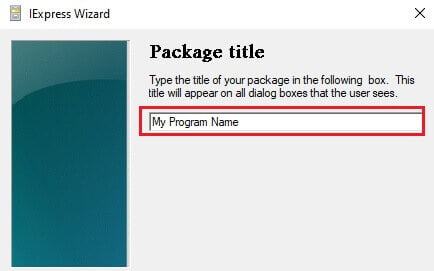
In this third window, you will be advised to enter a title that will appear in the dialogue window which “iexpress“ will use when extracting and unpacking the files contained in the installation package created. Basically it is the title that will be shown to the user when he installs the software. Then enter the title of your free choice and click on the “Next“ button.
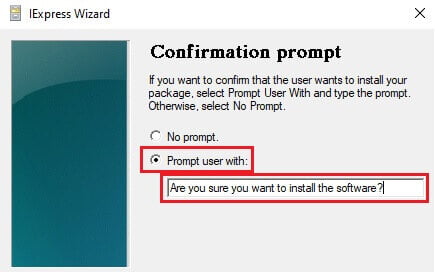
3.3. Set installation procedure confirmation message
Now, if you want to give the user the possibility to confirm whether or not to proceed with the installation, you must check the item “Prompt user with”. Enter the text you want to appear to the user to confirm the installation and click on the “Next“ button. In case you want to give the user the option to proceed immediately with the file extraction process then check the “No Prompt“ option.
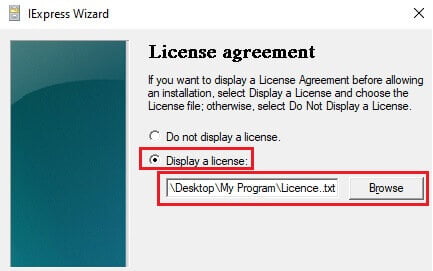
3.4. Specifies whether or not to accept the terms of a possible license
Like all software, generally also open source ones, they are linked to the acceptance of a license which regulates the distribution rules of a software product. Also in this case you can decide whether or not to show the terms of the license which will be contained within a file that you will choose by clicking on the “Browse“ button and which the user must necessarily accept before proceeding with the installation of the software or the unpacking of one of your folders. In this case, I have inserted the text relating to the open source license in the license.txt file. once this is done, click on the “Next“ button again and proceed to the next step .
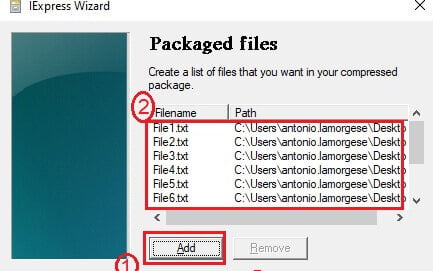
3.5. Add the files inside the package
This is the most interesting screen of the entire installation package creation process. So far, we have always talked about files that will have to be decompressed and then installed on the user’s computer. well, in this window you can upload, by clicking on the “Add“ button, the files you want to include in the final package. After that click on the “Next“ button again.
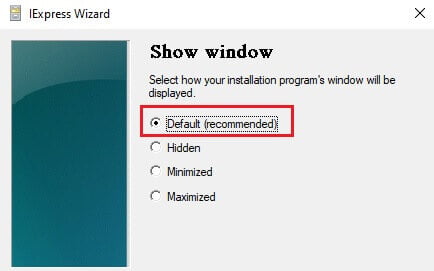
3.6. Sets the type of user dialog
Now, you have come to the point of deciding how you want to display the window that will show the user the whole process of installing and unpacking the files contained in the package. In this case I advise you to leave the “Default“ item, among other things, this option is the one recommended by the Microsoft developers. Click the “Next“ button again to proceed.
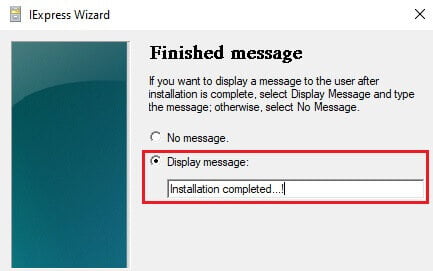
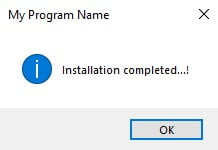
3.7. Add an installation completion message
You’ve come to the point of deciding what to display to the user at the end of the installation process. Usually the message, in these cases, is obvious. I’m talking about the classic “Installation complete…”. Then, type what you prefer and click on the “Next“ button to proceed to the next step.
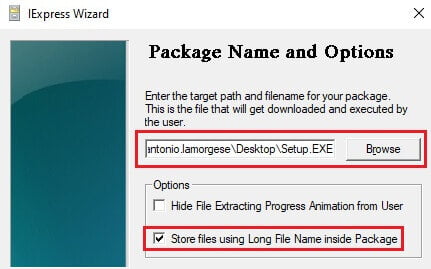
3.8. Destination path of the SetUp.exe file
You’ve almost reached the end. A few more steps and you’re done. Yes, because now you have to indicate where you want the “Setup.exe“ file to be created on your computer. That is, the file that you will then distribute to users. Then, click on “browse”, choose the path, the name of the installation file and click on the “Next“ button.
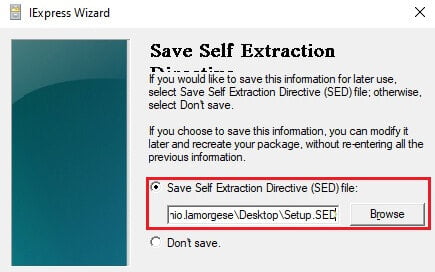
3.9. Save the file containing all package build options
So far, you’ve made choices about “iexpress”, you’ve also specified miscellaneous messages and options that have allowed you to customize the entire installation process that will process your “setup.exe”file. Now, you have the option to store all this information inside a file with the “SED”extension. Acronym of “Self Extraction Directive”. This file, in case you make changes to the files contained in the package, you can use it to recreate the installation package again using the “Open existing self Extraction Directive File“ item present in the “iexpress“ welcome screen, Remember? Then, choose the path and file name and click the “Next“ button again.
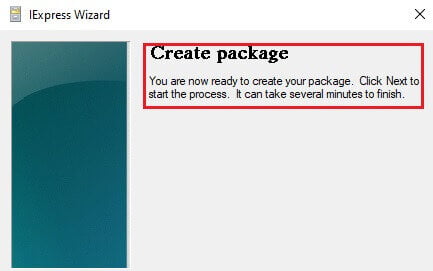
3.10. Create the final package
Here we are, click on the “Next“ button to give confirmation to “iexpress“ to proceed with the creation of your “setup.exe“ file which, depending on the number of files added, will need a few minutes to create it.
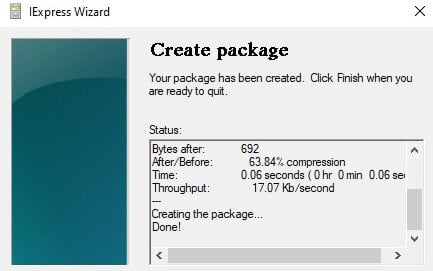
Once the package creation phase is over, “iexpress“ will display a screen containing all the information on the process just finished, including the percentage of compression used to add all the files contained. Now, click on the “Finish“ button and your “setup.exe” file will be ready to be distributed to users. You will find it in the folder you chose earlier.
4. How to run the installation package you just created
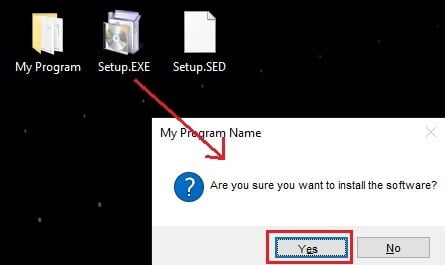
To start the installation and decompression of the files contained in the package, all you have to do is run the “setup.exe” file. then, double click on the file and agree to proceed with the installation by clicking on the “Yes“ button.
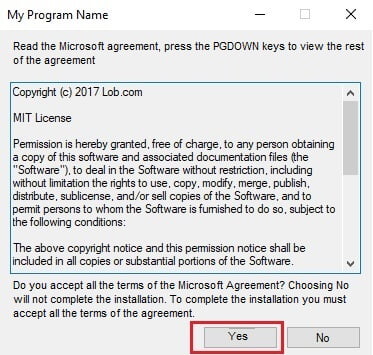
At this point, you will be asked to accept the license that regulates the distribution and the rights you have on your installation package. If you recall, it’s the license you entered in one of the steps in the packaging process.
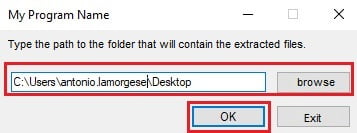
Now, choose the path that will host the files to install. That is, the folder that will contain all the files that will be processed during installation. then, click on the “Ok“ button and proceed.
At the end of the installation the user will be shown the “installation completed…“ message set in “iexpress“ during the creation and setup phase of the installation package.
The whole process of creating the installation package and running the setup.exe file, generated with “iexpress”, is finished. I hope I was able to explain to you a very useful procedure that every developer should know. I advise you to follow this short video tutorial, where you will be able to appreciate the extraordinary features of “iexpress”.