
How to install Windows 11 on Raspberry Pi 4
It has been almost a year now since my last guide on installing Windows 10 on Raspberry. Windows 11 is a reality and a Preview Build is already available, released directly by Microsoft. Today we will see how to install Windows 11 on Raspberry, by downloading the compiled version for ARM processors of the new operating system.
Microsoft has announced that you can freely install and try Windows 11 for 10 days. Within 10 days, it is possible to downgrade to the version prior to the installation of Windows 11 without losing files and personal data. After the 10-day trial has elapsed, you will no longer be able to downgrade to the previous version but, you will need to install the operating system previously installed on the computer from scratch.
READ MORE: How to fix Windows 10 in 5 different ways
Therefore it is preferable to install Windows 11 on a computer that is not usually used for work, in this regard the Raspberry pi 4 comes to our aid. In fact, the pre-compiled Windows 11 ISO for 64-bit ARM processors is already available on the uupdump.net site, that is, it can be installed on mini PCs such as the Raspberry Pi. Installing Windows 11 on Raspberry will give us the advantage of trying the new features of Windows 11, without affecting the features of the computer that we usually use to study or work.
So, you just have to get a microSD of modest capacity, download the ISO from the uupdump.net portal and transfer it to the MicroSD using WOR (acronym that stands for: Windows On Raspberry) but, let’s see the procedure in detail.
Table of contents...
1. Download Windows 11 Insider Preview
Before proceeding with the download of the Windows 10 ISO, it is necessary to install “Aria2“, a utility that is used to download and create ISO files directly from the internet, do this by following the procedure at this address.
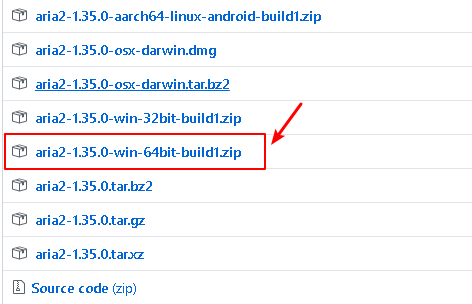
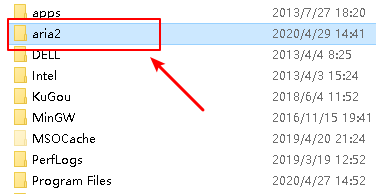
From the aria2 portal, download the 64-bit build, the latest version to date is 1.35.0. After downloading and unzipping the zip file, copy its contents to c:\, perhaps creating a folder named, aria2.
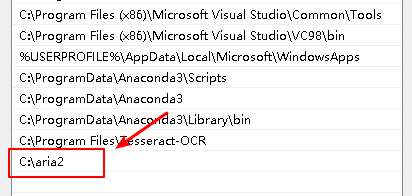
At this point, add the path c:\aria2, in the system path. Reaching this functionality from:
This PC> Properties> Advanced System Settings> Environment Variables.
Now run the “aria2c.exe” command, from the command prompt, and you should see the following output displayed. This means that aria2 is correctly installed on Windows.

For owners of Linux operating systems, things are slightly simpler. just run these two commands from the terminal:
sudo apt-get update -y
sudo apt-get install aria2 -y
Well, after installing aria2, you just have to continue following the instructions given below.
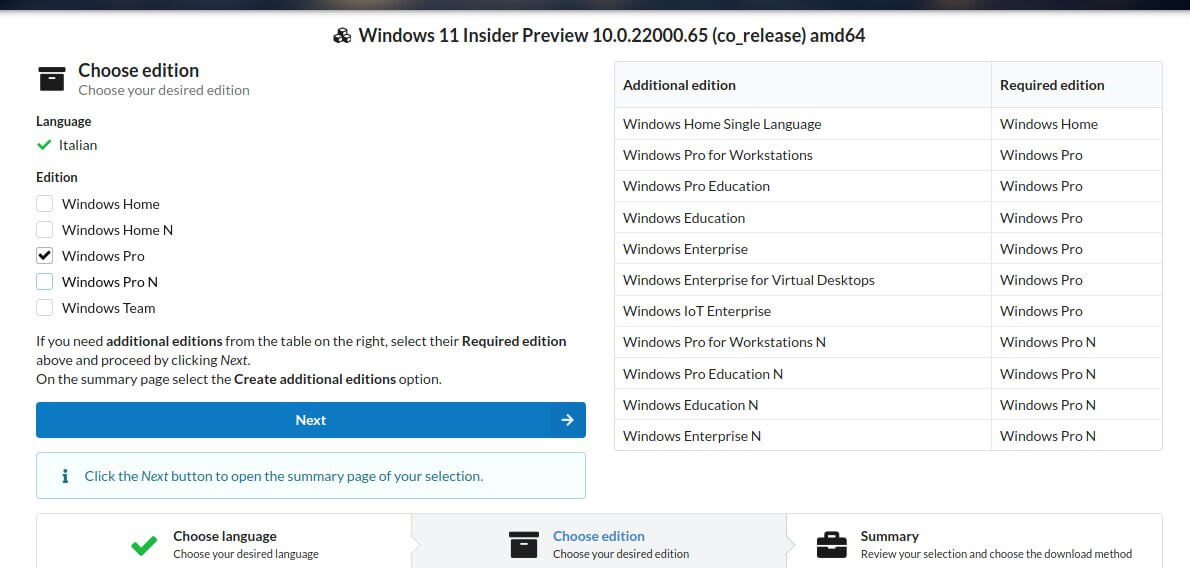
As I mentioned previously, we need to get an image of Windows 11 directly from the uupdump.net portal. Then, go to this portal and click on the downloads link. At this point, click on this item: Windows 11 Insider Preview 10.0.22000.65 (co_release) arm64, relating to the most updated Windows 11 Insider Preview ISO available today on the portal.

Choose the language, that is, select Italian, and click on the Next button, on the following page put the check mark on the edition of Windows 11 you prefer. In this regard, I recommend that you choose the Windows Pro edition and click Next.
at this point, leave the Download and convert to ISO and Include updates (Windows converter only) items checked, then click on the create download package button.
After a few seconds, you will automatically download on your computer, the .zip file containing everything you need to produce the previously selected ISO. Once the zip file has been extracted, you will find batch files available, for both Linux and Windows systems, and instantly executable on your computer.
If you have a Windows operating system, you must run the file with the .cmd extension, while if you have a Linux or MAC operating system you must run one of the files with the extension sh and containing respectively, in the file name, the words linux or MAC. It is likely that the Windows smartscreen filter blocks the execution of the batch script, raising the following message:
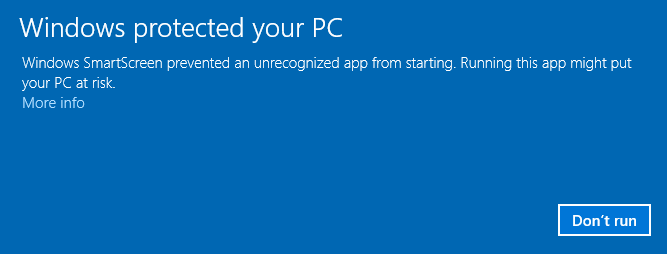
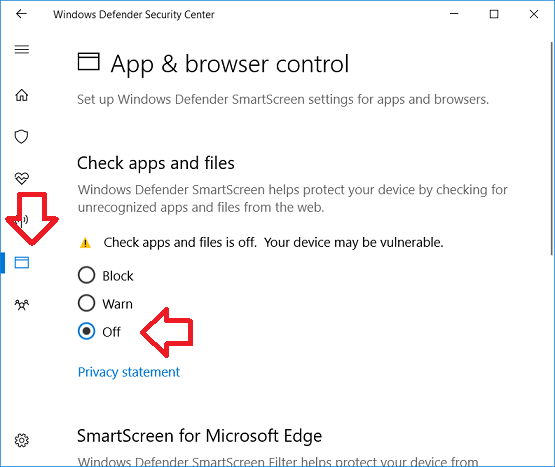
This does not mean that the script in question is dangerous, but Windows sees it this way and blocks its execution. In this regard, it is good to disable the smartscreen filter, by disabling these two items in the windows security menu, and restore it after script execution.
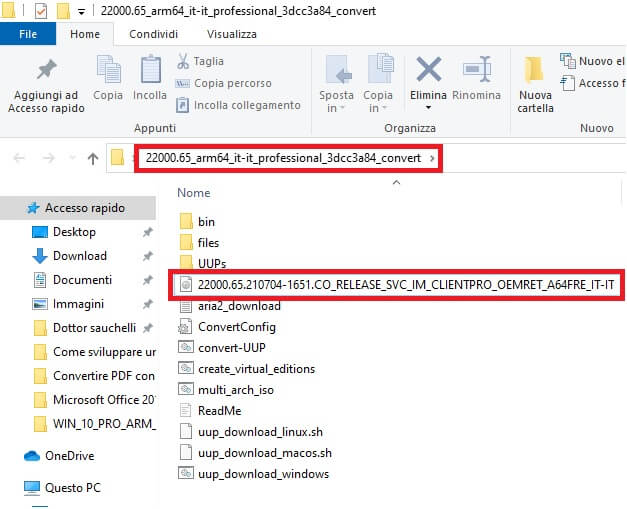
In any case, after the execution of the batch script, the system will produce the ISO selected and that you will find in the same folder as the batch scripts, as shown below.
Keep in mind that this phase can last even more than half an hour. Logically this depends on the internet connection speed, at your disposal, and on the performance of your pc.
After this phase, we have to download and install WOR, which as we said before is the software that will allow us to install the Windows 11 ISO on the MicroSD that we will later insert into our Raspberry Pi.
2. Install WOR
We have reached the point where, the bulk of the work is done, but we still have to proceed with the second phase which is to download and install WOR, the tool produced by the Windows On Raspberry community, which will allow us to install windows 11 on the MicroSD or, in any case, on an external disk as it could also be a USB stick.
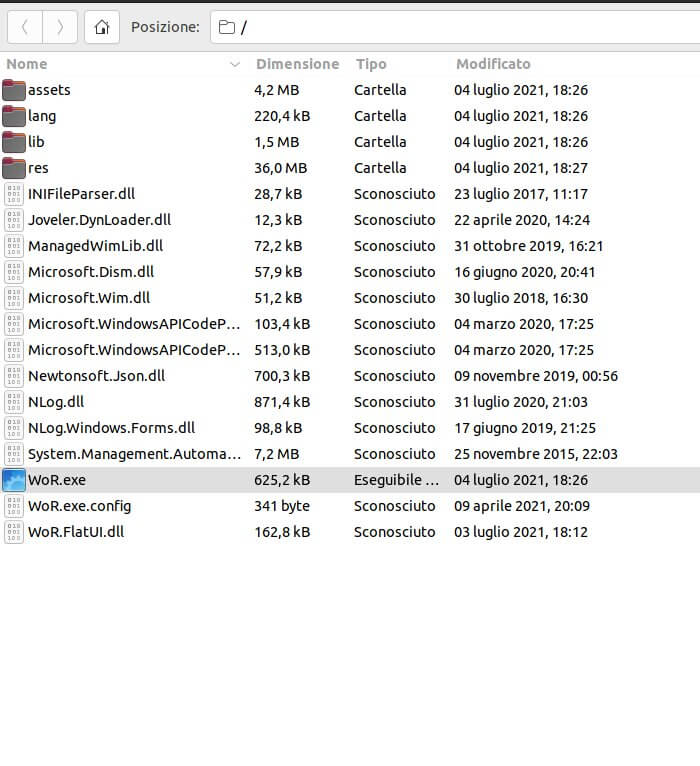
Then, go to this web page and download Windows On Raspberry Imager. WOR is currently at version 2.2.1, so click on the Download version 2.2.1 button. Once you have downloaded and extracted the contents of the zip file containing WOR, you will need to run the wor.exe file.
The contents of the zip file should be identical to that shown in the figure.
From this point on, the steps to follow are really very simple and intuitive. In fact, once executed, WOR will ask you on the first screen, that is, on the welcome page, to select the language, and consequently we select the Italian language and click on next.
Let’s go back to the ISO you downloaded earlier for a moment. As a first step you have to mount the ISO, the operation is very simple click with the right mouse button on the ISO and select the mount context menu item. (If the “mount” item does not appear in the context menu, most likely it is because you have installed programs like 7-zip, CDburner or similar on your PC. You need to uninstall these programs to allow Windows to manage the mounting directly. of ISO files on virtual CDs.)
After the “mount” of the ISO, in the explorer, you will find another device with all the files present in the ISO, mounted, just as if you were reading the contents of a DVD from the optical player. In this drive, it is precisely in the \ sources \ folder, there is the install.wim file. You will feed this file later to WOR when it asks you for the image to upload to the MicroSD.
Now insert, through the adapter, the Micro SD of at least 32 GB, in the computer running WOR.
Now, extract and start, with administrator rights, the “Windows On Raspberry” program, downloaded previously, by clicking on the executable, WOR.exe, present in the extracted folder.
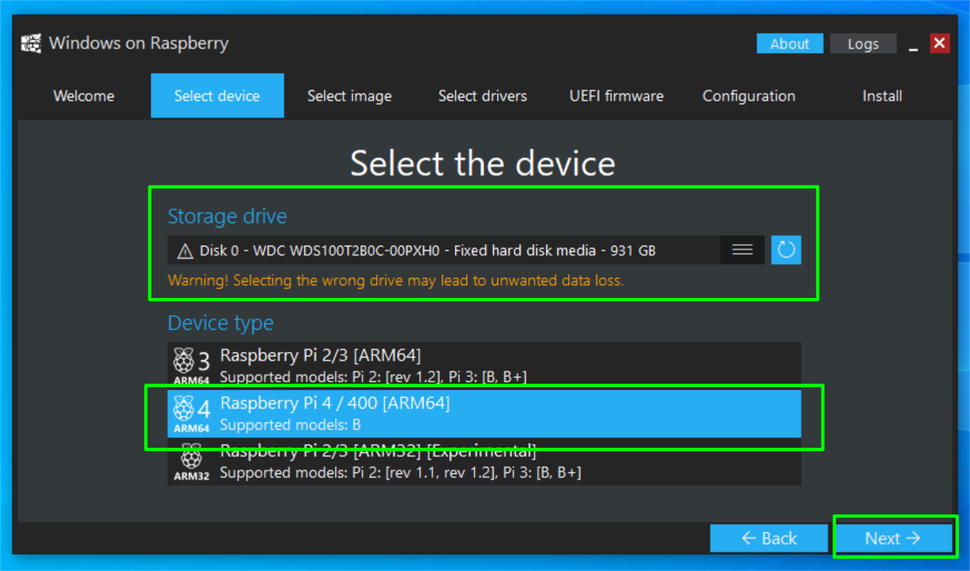
On the second page, the one relating to the device and peripheral used for storing Windows 11, we must indicate the MicroSD, which at this point we will have already inserted into the computer via its adapter, and the type of Raspberry Pi in our possession. Then click on next.
On the third page, displayed by WOR Imager, we must indicate the install.wim file, which as I told you previously is present on the drive that mounts the ISO is precisely in the sources folder, after selecting the install.wim file, check that the the corresponding edition of Windows 11 is actually the one indicated by WOR Imager. Now click on next.
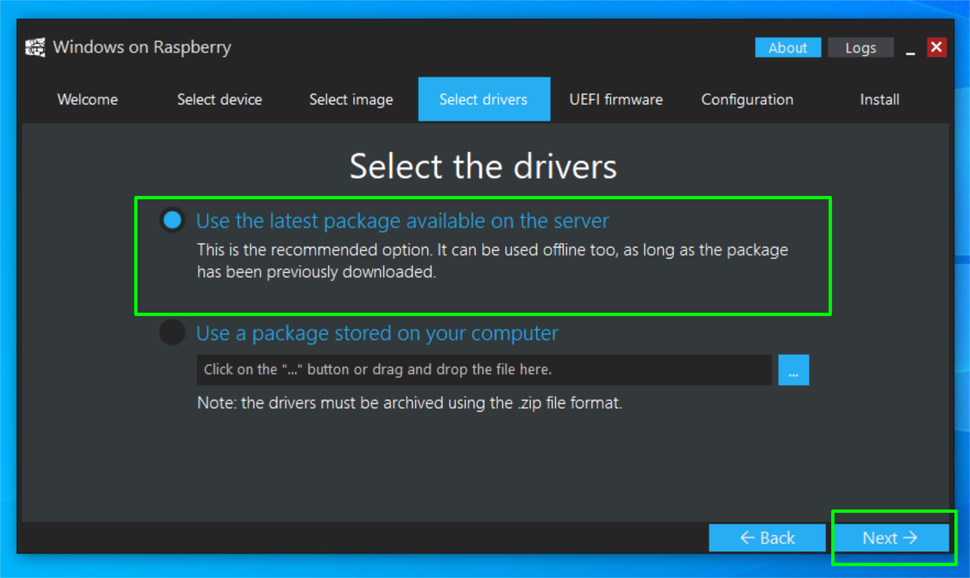
At this point we just have to select a useful driver for Raspberry Pi. But we will let Wor Imager search for the most updated and available one on the net. Then, check the item, Use the latest package.
The time has come to also specify an updated firmware for our Raspberry Pi. Also in this case we will let WOR download the most updated and available one on the net. Then check the item, Use the latest firmware available on the server.
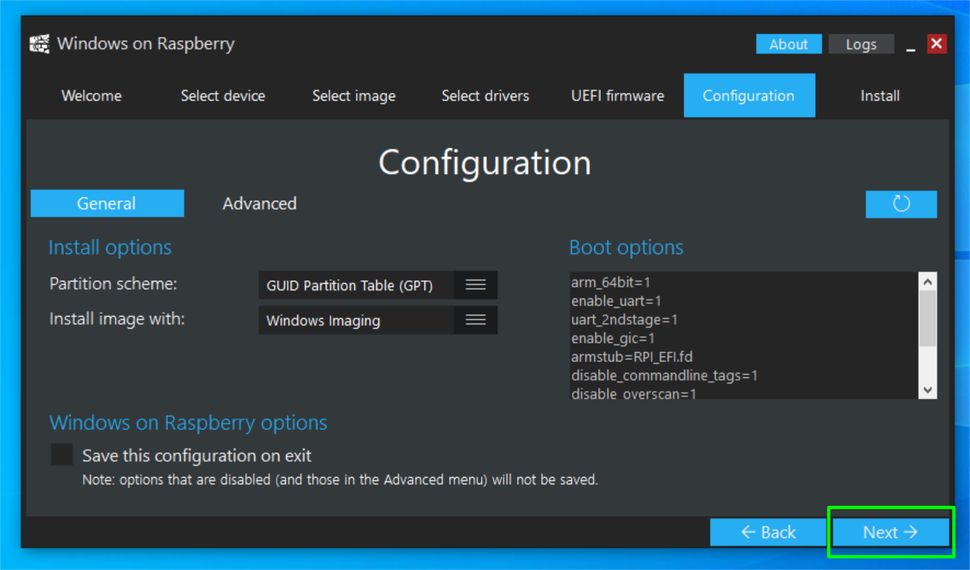
Well, we’ve come to the Raspberry Pi configuration board. Here we have to pay attention to only one thing. If Windows 11 is to be downloaded to a MicroSD, then the boot partition scheme must necessarily be Master Boot Record.
If, on the other hand, we are installing Windows 11 on an external drive, such as a USB stick, then the boot partition scheme must be GPT. Now we just have to click on Next and wait for the installation of the operating system on the previously selected device.
Then, click on next and then on the Install button. Attention, I want to clarify that this phase is the longest of the whole procedure. From tests carried out I found that the times are around two hours. Logically this time depends a lot on the internet connection speed available and the performance of the computer at your disposal. In any case, at the end of the installation all you have to do is remove the MicroSD from the computer and insert it into the Raspberry which must necessarily be turned off.
3. Install Windows 11 on Raspberry
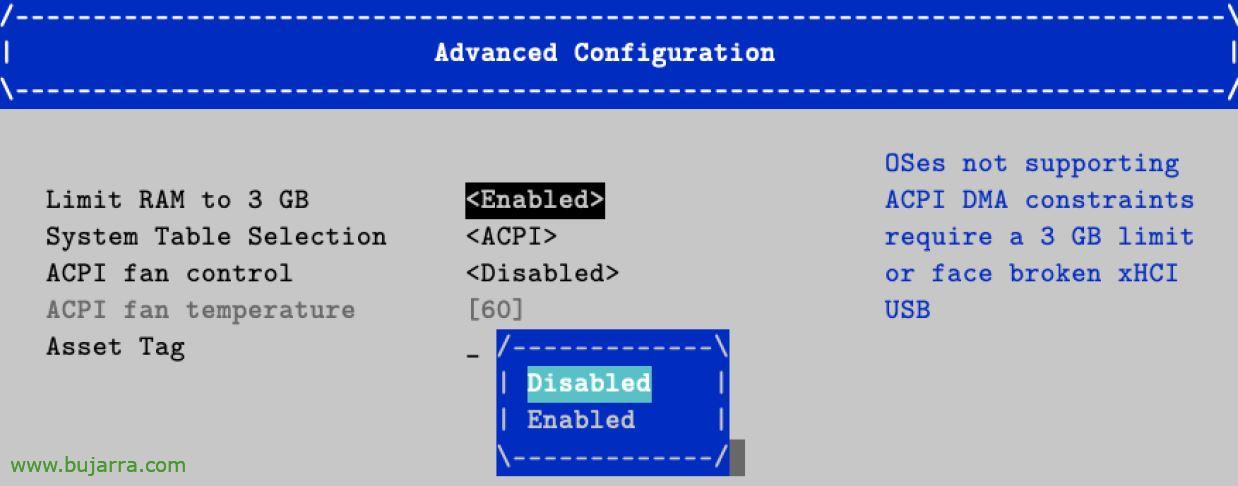
After switching on, it is advisable to enter the Raspberry configuration, by pressing the ESC key as suggested when starting the device, and deactivate the 3 GB limit, set by default on the use of RAM memory.
Once this phase is completed, restarting the Raspberry will proceed normally by presenting you with the classic Windows installation procedure.
In any case, in this video tutorial, you will be able to see step-by-step, everything covered in this guide. If you are interested in joining the Windows On Raspberry community, you can click on this link. You will have the opportunity to stay up to date on everything related to Windows and Raspberry.