How to install Windows 11 on Mac M1 and Mac M2
If you own one of the new MacBook M1 computers, you might be surprised to find that it’s actually compatible with Microsoft’s new Windows 11 operating system. That’s right, your new MAC M1 computer can run Windows 11 as well as any other version of MacOS. Fortunately, there is a free tool that will allow you to install Windows 11 on MAC in a few simple steps.
You cannot imagine what I am about to tell you. Yes, it is. Windows 11 installed on Mac. Do I need to add anything else? Well, I’ll tell you more, the best option is to buy a Mac with an M1 processor. This way, you will be able to boot any USB drive without formatting the hard drive and immediately start Windows 11 with excellent performance. Now, let’s see how to do the impossible, that is, install and run Windows 11 on any Mac computer.
Table of contents...
1. Download and install UTM on Mac M1
Installing Windows 11 on Mac M1 is free, moreover, if you use the right tool, it becomes a simple and executable operation in no time. a while ago, when MAC computers were equipped with Intel processors, installing Windows on these computers has always been possible. Unfortunately, with the installation of the new M1 processors on MACs, running Windows is more difficult, but not impossible. Fortunately, thanks to the work of many developers, we have come up with a noteworthy product that can install Windows 11 on MAC M1 without a hitch. The software is a free UTM alternative to Parallel Desktop.
UTM, uses QEMU as emulation software. QEMU is free and decades-old open source, widely used and kept up to date over time. However, QEMU, while very powerful, is difficult to configure. On the other hand, UTM is designed to offer users all the flexibility of QEMU by automatically carrying out all the configuration required for its operation.
Furthermore, UTM, unlike other free virtualization software, was created specifically for Mac computers and runs exclusively on Apple platforms. Now let’s see how to proceed to install Windows 11 on MAC M1.
Read more: “The best 10 Android emulators for PC and Mac”
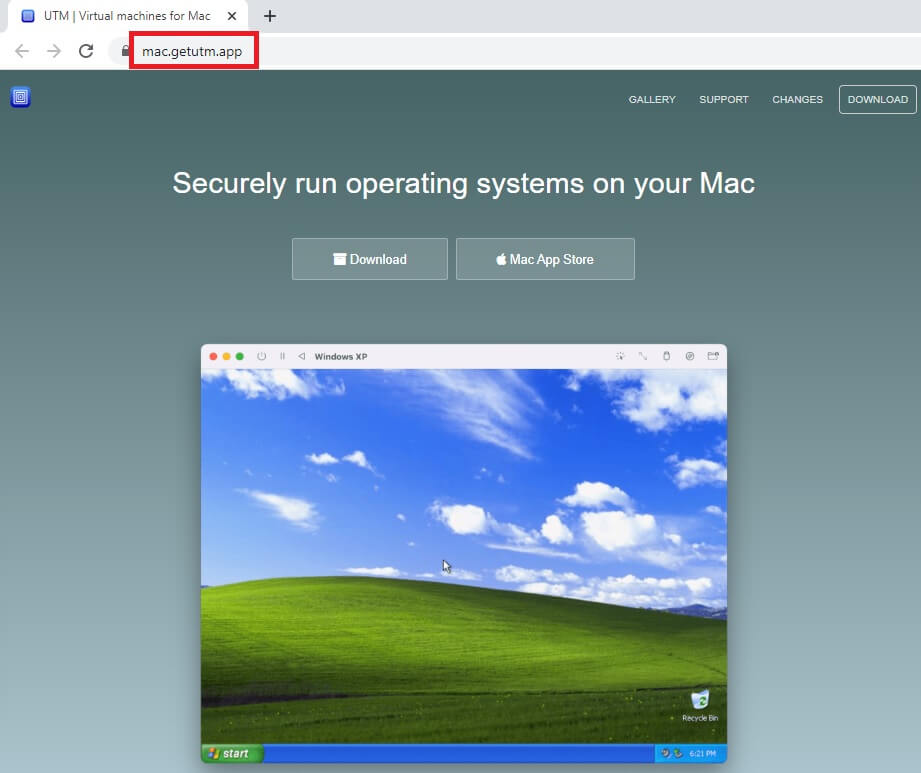
The first step is to download and install UTM from this web page, by clicking on the “Download” button on the UTM homepage.
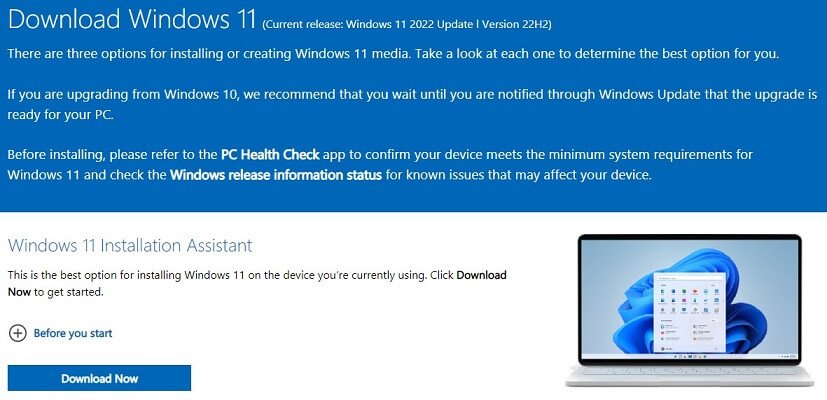
Once the “UTM.dmg” file has been downloaded, drag it to the applications folder and launch it as you do with any other program. For the purposes of this guide you will need to download two more files, the first is the “SPICE Guest Tools” file, which can also be found on the UTM homepage at this link, while the second is the Windows 11 ISO that can be downloaded directly from the Microsoft website.
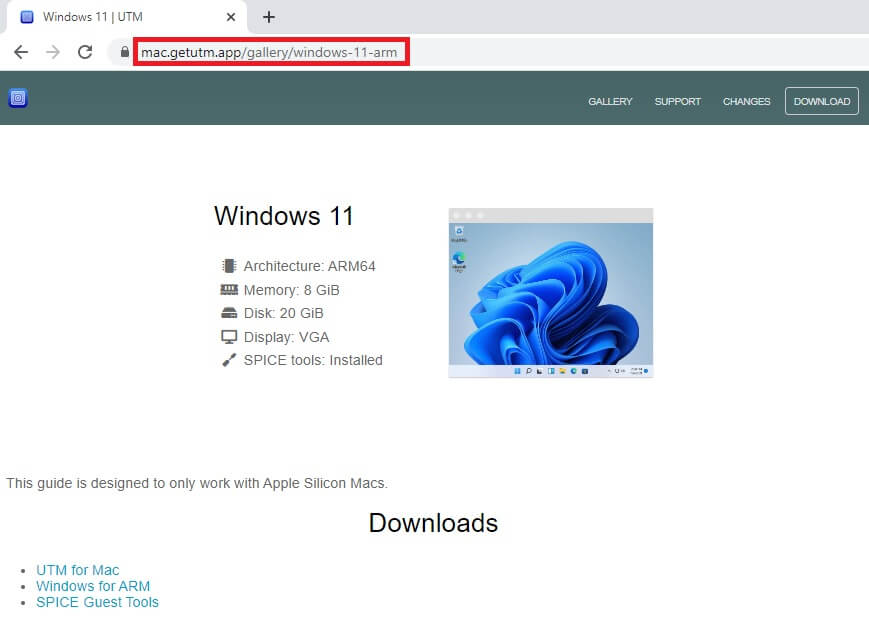
Alternatively, by clicking on the “Gallery” link, also present on the UTM homepage, it is possible to select the operating system to be virtualized and retrieve the necessary files by clicking on the links available in the gallery. In fact, by scrolling through the results of the Gallery, you will notice that UTM can virtualize a considerable number of operating systems. Now, click on the icon depicting Windows 11 and you will be able to download all the files you need from this location.
Once you have recovered all the necessary files, you can proceed with the installation of Windows 11 on MAC M1.
2. How to install Windows 11 on Mac M1
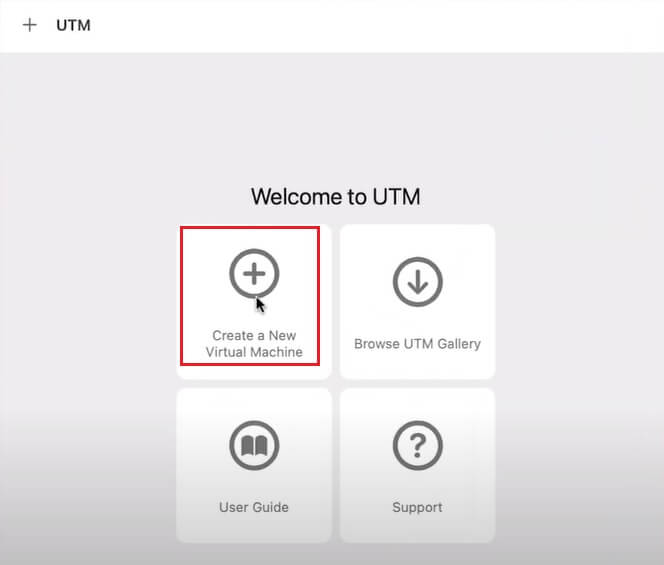
Once UTM is launched you have to click on the “Create a new virtual Machine” button.
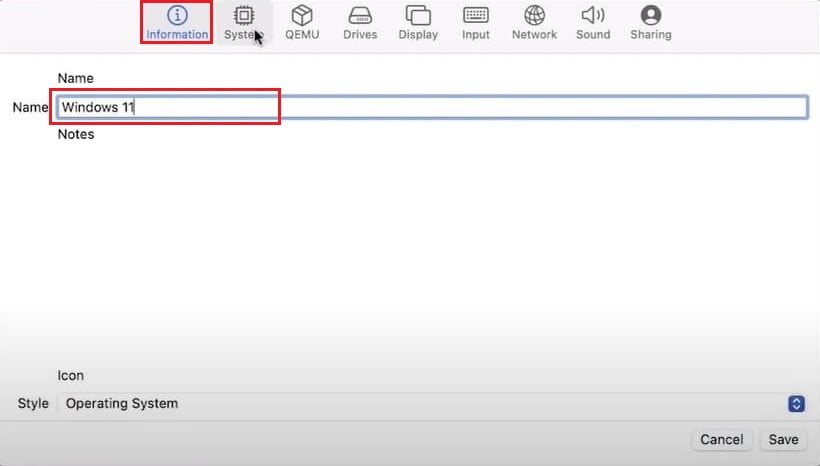
In the “Information” tab specify the name you want to give this virtual machine. In this case you can type, for example, “Windows 11” and from the drop-down box “style” choose “operating system“.
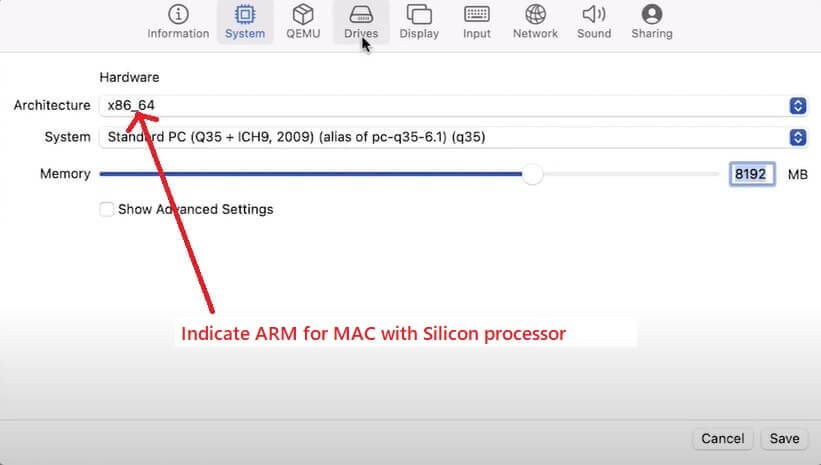
Now, go to the “system” tab, and choose “arm” as the architecture if your MAC has a silicon processor, or, “x86_64” if your MAC has an intel processor. Increase the memory to 8GB and move to the “Drives” tab.
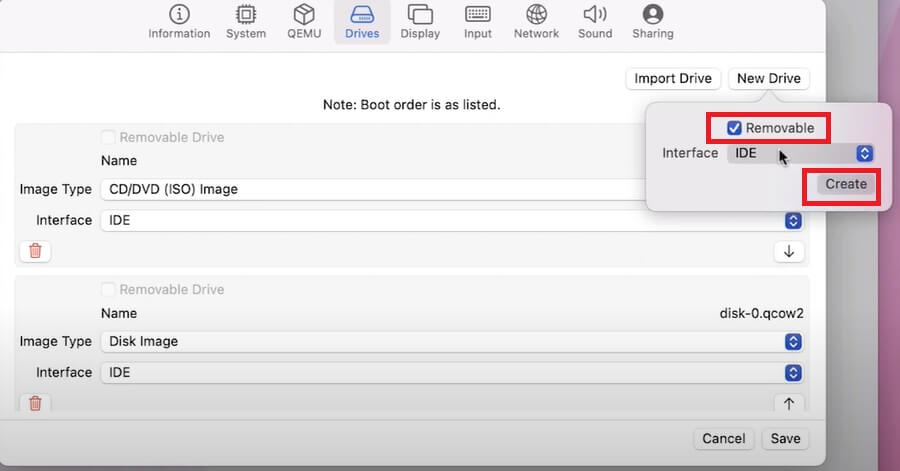
In the “Drives” tab, click on the “Import Drive” button, select the Windows 11 ISO, previously downloaded from Microsoft and proceed by clicking on the “New Drive” button where you will set the “IDE” item for MAC with Silicon processor, or, “USB ”, For MAC with Intel processor. Once these settings are finished, click on the “Create” button.
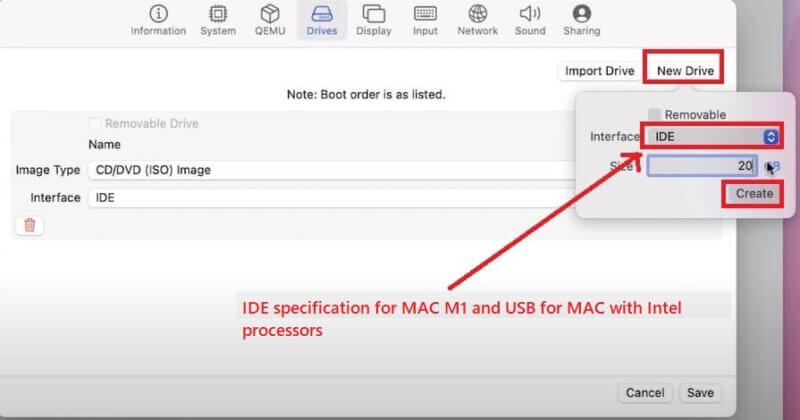
Now, you need to create another virtual drive but this time removable. Then, click again on the “New Drive” button, check the “Removable” item and click, once again, on the “Create” button, leaving the “IDE” or “USB” item unchanged as previously described.
At this point your virtual machine with Windows 11 is ready, so click on the “Save” button to save the changes and finish the configuration phase. Now let’s see how to start the newly created virtual machine.
3. Start Windows 11 on Mac M1
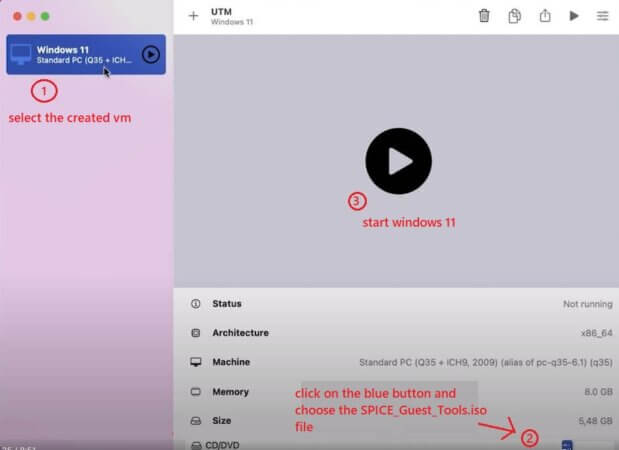
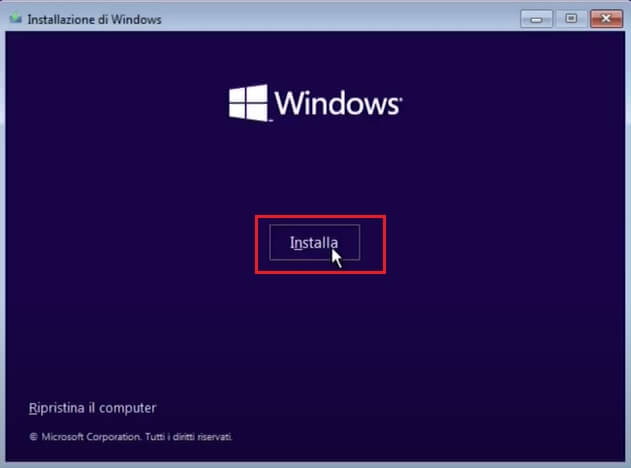
The start-up phase of a virtual machine, created with UTM, is of disarming simplicity. In fact, to start Windows 11 on Mac, you just have to select the VM created, click on the “CD/DVD” item, select the “browse” function and indicate the file SPICE Guest Tools.iso, then click on the central button “Play” to start the virtual machine with Windows 11.
After pressing any key on the keyboard, you will continue with the installation of Windows 11 as required. If, during the installation of Windows 11, the message in the figure is raised, it means that our virtual machine does not meet the minimum requirements for starting the operating system.
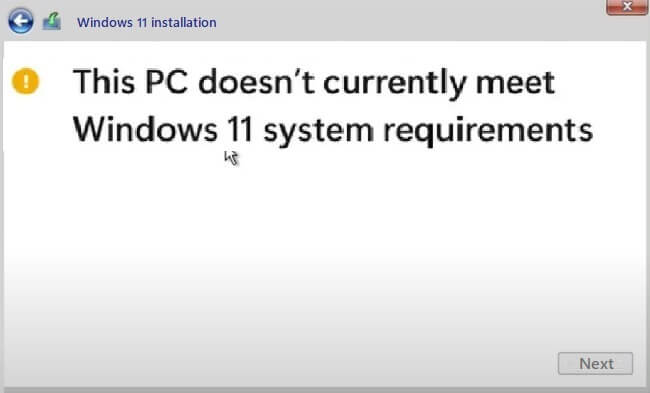
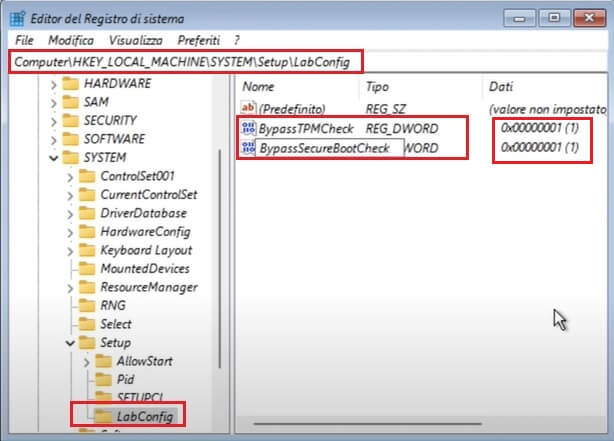
You can avoid this type of check and continue with the installation of Windows 11 by opening the terminal, pressing the “SHIFT + F10” keys, and typing the command “regedit.exe” followed by the “ENTER” key. After opening the registry, you must navigate to the path “HKEY_LOCAL_MACHINE/System/Setup“, add the “LabConfig” subfolder and, under this folder, add the keys highlighted in the figure by setting them to “1“.
Now, close the warning message, and start the installation of Windows 11 again.
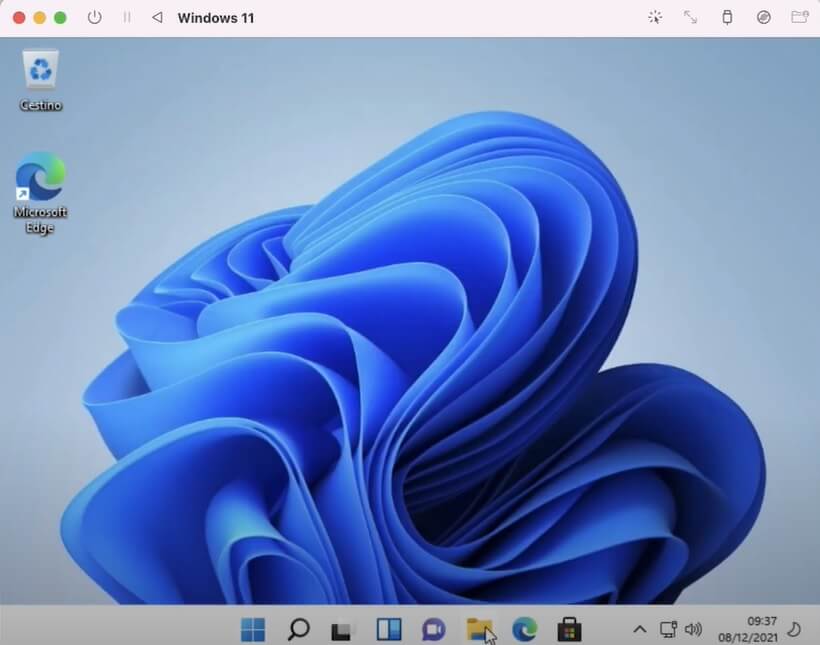
Once the operating system has been installed, it will be possible to use Windows 11 as if it were a separate computer.
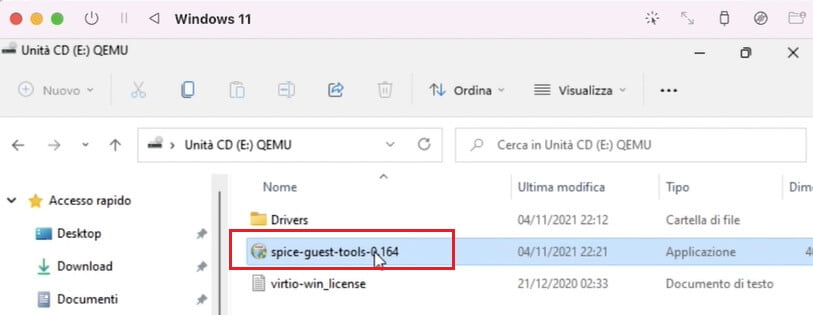
Now, you have one last thing left to do, that is, to install the SPACE Guest Tools utility. Then, open the explorer and select the CD drive “E: QEMU” and launch the “spice-guest-tools-0.164.exe” file. this utility will install all the drivers needed by Windows 11 in order to function properly. From now on, Windows 11 is installed and ready for use.
4. Final remarks
Although this procedure is very simple, it is extremely reliable and safe. With UTM you can virtualize the vast majority of operating systems on a MAC computer regardless of the type of architecture available. Therefore, whether your MAC has architecture with Silicon processors, or architecture with Intel processors, you can virtualize all the operating systems listed in the Gallery available on the UTM portal. As you could see, the procedure is simple, however, you can follow this short video tutorial that will dispel any doubts you may have.