Photo editing free basics
Learn the fundamentals of photo editing. Cropping, exposure, saturation, white balance, sharpness, and other issues are among the topics covered.
di Antonio Lamorgese
Whenever you have the hang of understanding your camera, exposure fundamentals and how to form an incredible photograph, now is the ideal time to gain proficiency with a couple of photo editing free basics to put the final details on your imaginative vision. The means underneath will kick you off on the photograph altering process immediately. You’ll likewise track down things to ponder before you start altering toward the finish of this article.
The essential photo editing methods ought to be accessible in even straightforward altering programs, and each can improve your pictures to make them all the more impressive and share commendable. High level altering programming will offer these fundamental devices and will likewise incorporate refinements that permit you to do more complex altering that is outside the extent of this article. You don’t need to do all the fundamental altering steps on each picture, however the means you decide to do ought to be finished in the request recorded.
The most straightforward photographs to alter, obviously, are ones taken by a gifted picture taker who finds opportunity to have extraordinary chances in the field. (You’ll likewise need to consider shooting in Crude picture design for the best altering control. Peruse Understanding Your Camera to look into Crude versus JPG picture designs. You ought to likewise be sure your altering project can work with Crude pictures.) To begin figuring out how to have the best chances, think about taking an involved photography course.
Table of contents...
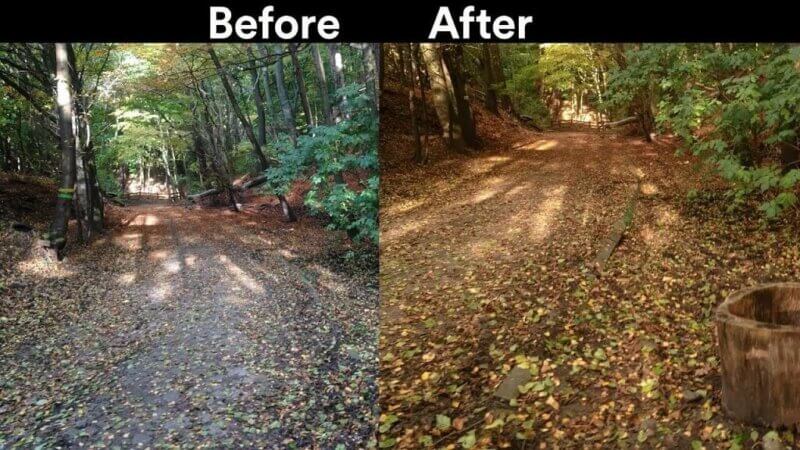
1. Crop and Clean your photos
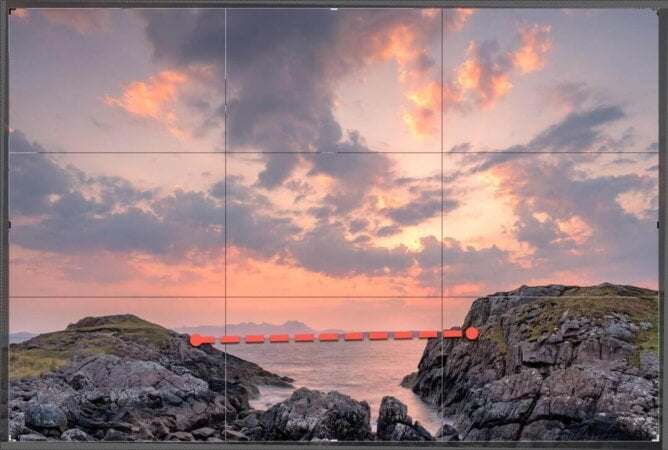
Fix pictures: It’s in every case better to focus on be certain your viewpoint is flat when you shoot, however fixing is additionally a simple first altering step.
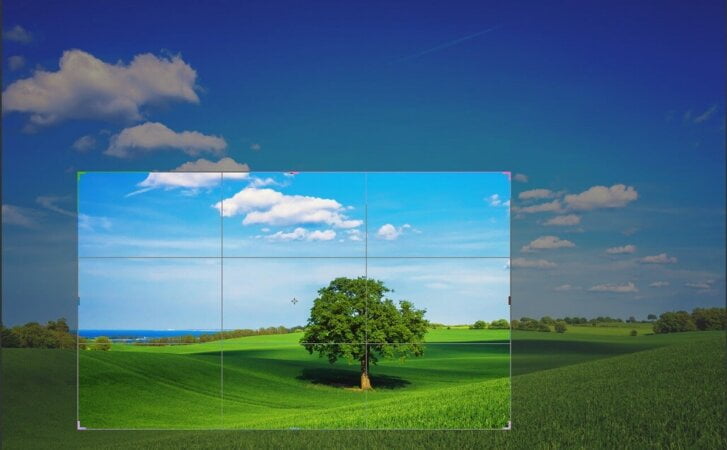
Crop pictures: It’s ideal to trim to work on minor compositional subtleties, such as diverting components at the edge of the casing or repositioning your subject marginally.
Spot-clean pictures: The outside is a dusty spot and nature’s coarse components have an approach to tracking down their direction onto your camera focal point, and afterward onto your photographs. (Utilizing a focal point brush routinely in the field eliminates this.)
Most editing programs have a spot-eliminating instrument. The name shifts: “clone stepping” and “spot recuperating” are two varieties. Programs likewise let you change your perspective on a photograph to feature the area of spots. Work your direction purposefully around your photograph until you have a without spot picture.
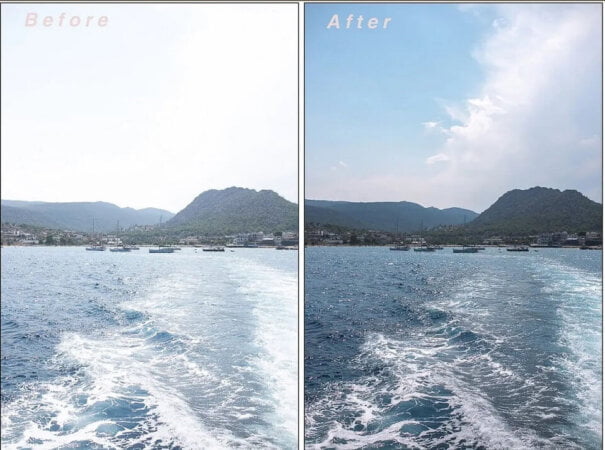
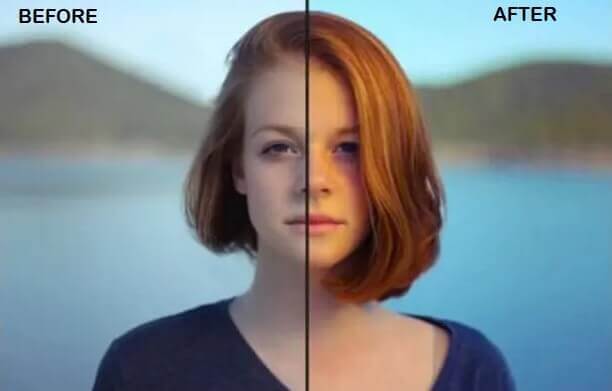
2. Adjust white balance
White balance connects with variety levels, not openness levels. Assuming your picture has a general variety tone that you view as disappointing or unnatural, you can change white equilibrium to fix it. Note that JPG records, since they catch definitely less computerized information than Crude documents, offer an insignificant measure of white equilibrium change during altering.
Most altering programs let you pick from preset modes like “streak”, “sunshine” or “shady” to more readily adjust the picture for the lighting conditions when it was shot. Moreover, many have both a “temperature” and a “color” slider that you can mess with to tweak the general lighting cast on a picture.
3. Adjust exposure and contrast

Adjusting exposure: This is the most common way of making the photograph precisely as splendid or dim as you need. Note that a mottled look can in some cases be presented when you wrench up the brilliance. That is the reason it’s in every case better to get the right exposure (one that is adequately splendid) when you first snap the picture.

Adjusting contrast: This is the scope of dim to light tones. At the point when it’s additional high, you see an unmistakable picture, where all tones, paying little heed to variety, are either extremely dull or exceptionally light. At the point when it’s additional low, you see a level picture where no components in the casing stick out. Normally, you need a center difference that dodges both of those limits. However, assuming you favor both of those impacts, you can change the difference to accomplish that.
Read more: how to make money with photography with ClickASnap
4. Adjust colors and saturation
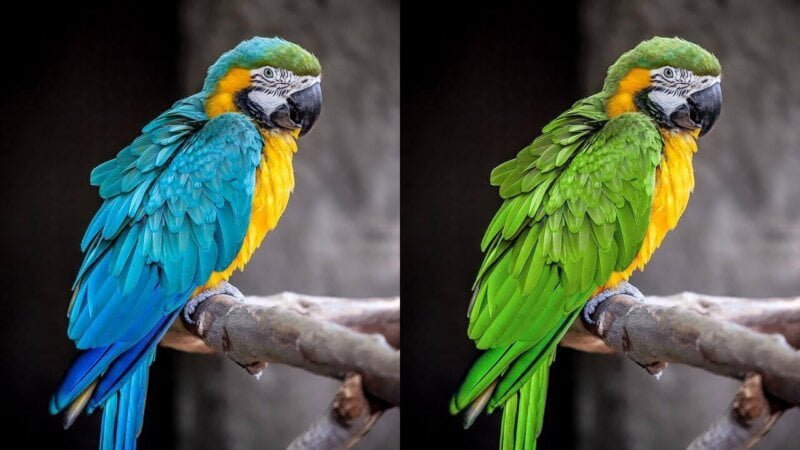
When white equilibrium is changed, you can additionally refine colors in your photographs with the immersion and energy controls. The differentiation between the two is unpretentious: Expanding energy increments variety power in nonpartisan variety tones and keeps up with variety force in the more brilliant varieties. Expanding immersion makes all varieties all through the casing more extreme. At the point when splendid varieties pop, it can give the photograph a more emotional look.
5. Adjust sharpness photos
Sharpening an picture gives it a crisper, cleaner look. Many projects offer different honing apparatuses. Start by changing the general measure of sharpness (on a scale from 0 to 100). Begin at 50%, then change the step up or down to get the sharpness you like.
Explore different avenues regarding your altering project’s extra honing elements to see the impact each produces. One you could attempt is a “lucidity” or “design” device. It makes the edges of articles in the photograph stand apart more, giving the general picture a punchier look.
You really want to take a gander at individual region of the edge to assess the impact of every sharpness change. Having super-fine subtleties won’t make any difference much for web-based entertainment posts, yet it will significantly impact any picture you intend to augment and print.
Note that Sharpening an picture can’t transform an out-of-center shot into an in-center shot. No altering apparatus can do that. Likewise, assuming that you hone a picture a lot of you can make an unnatural radiance impact around objects in the casing.
6. The importance of photo editing
On the off chance that you’re new to photograph altering and you don’t have the foggiest idea where to begin this video is here to assist you with benefiting from your photographs and further develop your altering game. In this video learn you 9 crucial stages in getting your photographs looking perfect. Anything you like to photo these photograph editng tips ought to help and the work process can be applied to all genres.
The target is to give fledgling photographic artists a manual for assist them with get everything rolling with a strong altering work process that is not difficult to carry out and will get your photographs looking perfect in a matter of seconds.
7. Conclusion
After you’ve done the entirety of your altering, put your photographs away. Then, at that point, return later and analyze them to check whether you’re content with every one. On the off chance that not, make extra altering changes where required.
Then, at that point, since Crude documents are so huge, you really want to switch them over completely to JPGs before you email, post, offer or print your altered photographs. You ought to likewise save every one of the last altered renditions of pictures close by the first pictures they came from.
8. Other useful resources
Now that you know how to improve the result of each of your shots and retouch images as only a professional would, as always, I suggest you take a look at this link where you can find other articles that may interest you.