Email tracker: How to track emails on Gmail
To track emails would allow the sender to intelligently follow the entire process of the email message.
di Antonio Lamorgese
Who knows how many times you’ve sent an email and don’t know if and when it is read by the recipient. This issue is of enormous importance in all those communications where the monitoring of an email is of fundamental importance. As a result, figuring out how to track emails on Gmail, via an email tracker, would allow the sender to intelligently track the entire email message process.
Table of contents...
1. How does it work
It all works pretty much, like the most famous messaging app, I’m talking about WhatsApp. That is, when the sender sends an email, we will see two gray check marks appear next to the subject of the email sent.
The first check mark will turn green when the recipient receives the message, then the second check mark will turn green when the recipient has read the message. Providing the sender with information on the date and time the e-mail was read.
2. How to implement tracking
First of all, there is a fundamental requirement: your emails must be sent using only the web browser, Google Chrome. This is because email monitoring will take place by installing a free extension for Chrome, called MailTrack.
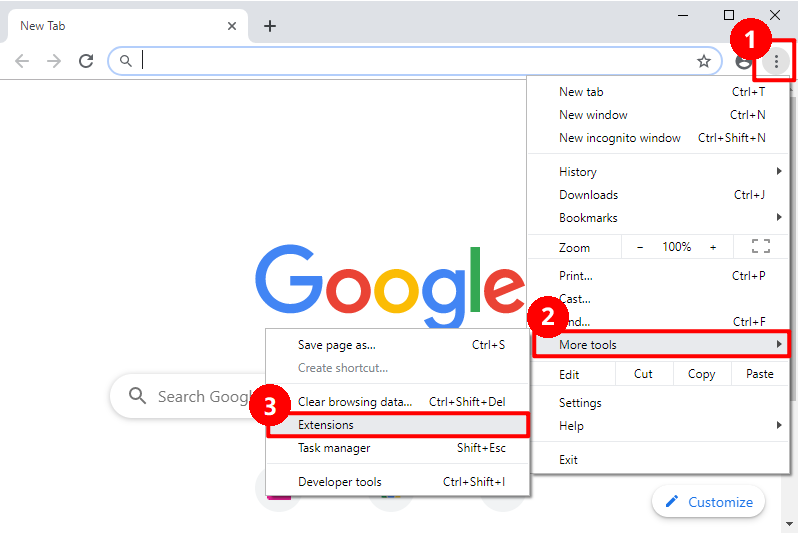
So, first of all, open Chrome, click on the icon at the top right and select the menu item More Tools -> Extensions.
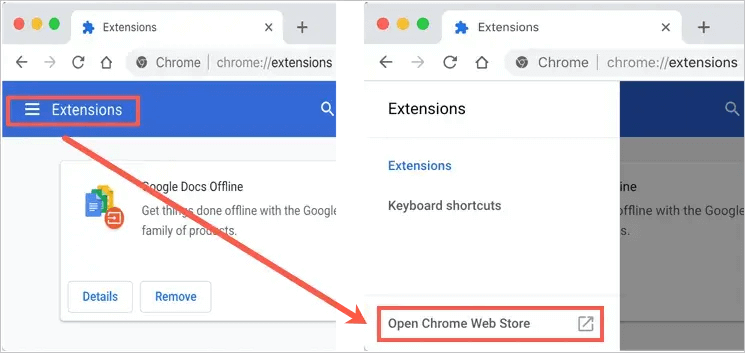
After reaching the page, which will allow us to call up the Chrome web store, that is the portal from where you can install all the extensions related to the Chrome browser, click on the item “Open Chrome Web Store“.
In the upper left corner, you will find the search box for extensions, then type “mailtrack” and then click on the suggested item “Mailtrack for Gmail”, then press enter to start the search for the MailTrack extension.
Once you have obtained the extension, in the right pane, click on the extension itself and proceed with the installation in Chrome.
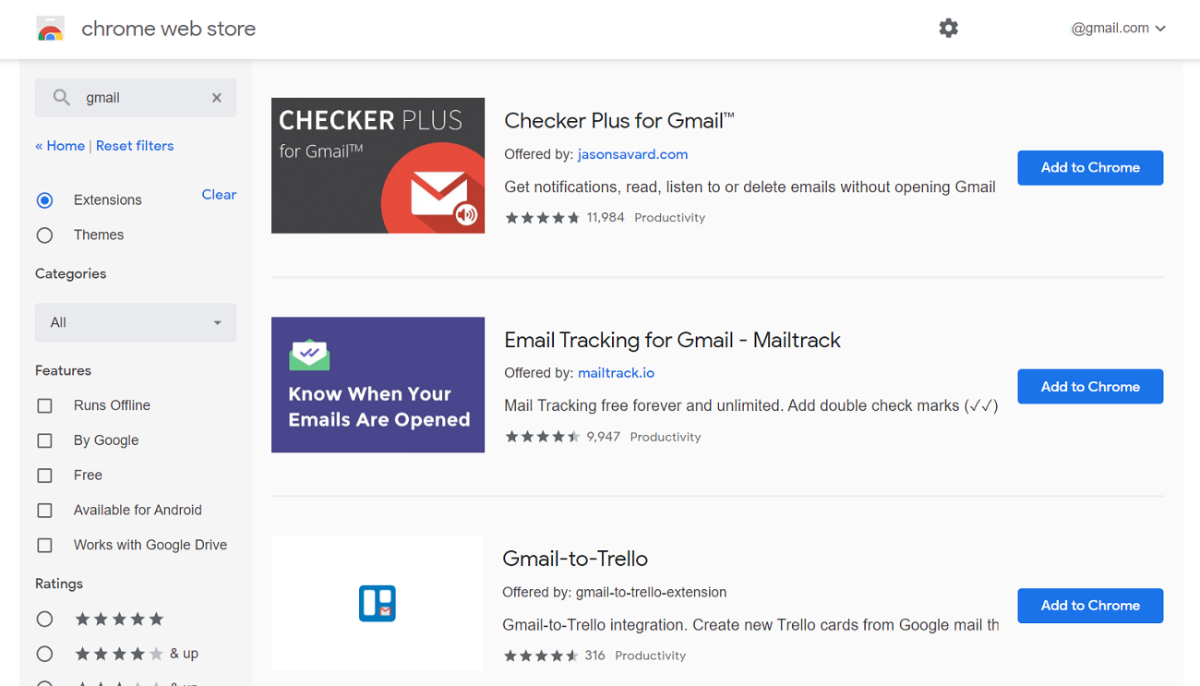
Click on “Add” and again on “add extension”.

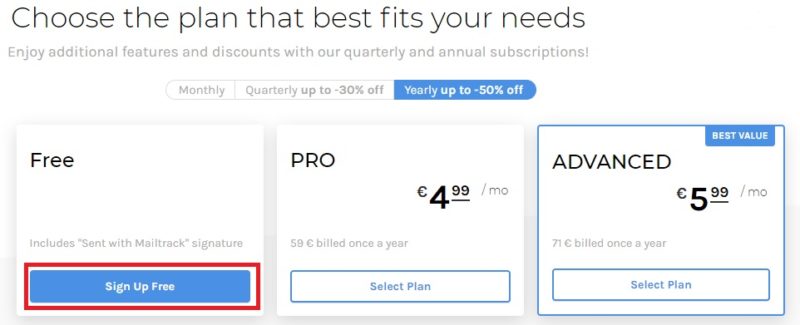
Choose the plan that suits you best, the FREE plan is more than enough and continue with the installation.
3. How to connect MailTrack to Gmail
At this point there is a clarification to be made, Mailtrack in order to manage the tracking of your emails and consequently, to be able to give you all the information relating to the monitoring of your emails, needs to access your Gmail account. Therefore it is necessary to give your consent to this type of operation.
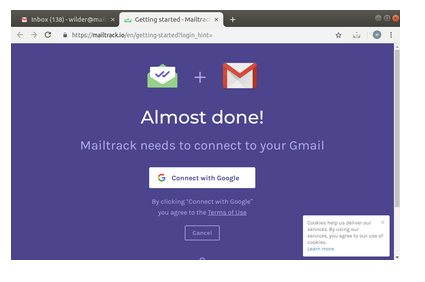
Then, after the extension installation procedure, MailTrack will ask you to connect to Gmail. The operation is very simple, you just need to click on the “Connect with Google” button for the note.
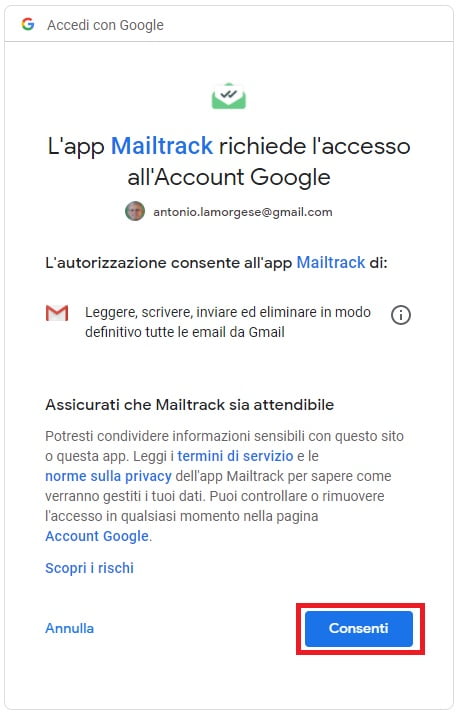
Next, choose your Gmail account, or enter your Gmail login credentials, and click on the “allow” button.
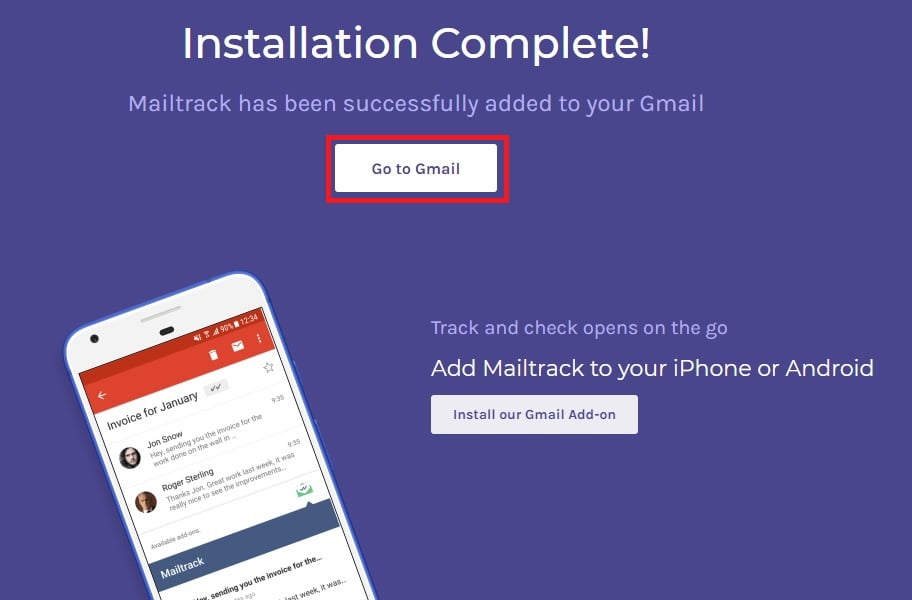
This is all you need to do to install the mailtrack extension, and connect it to your Gmail account.
4. Proof of sending email with tracking
At this point, open Gmail and try to send an email, not to yourself as the extension does not track this type of email.
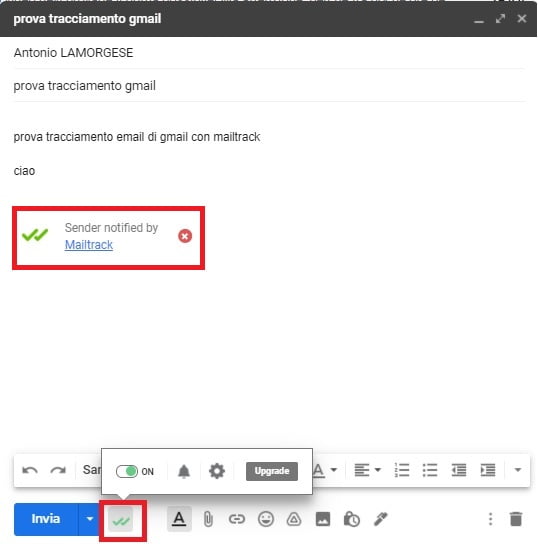
Now in the classic GMail submission window, you will notice that something has already changed. In fact, the signature of the mailtrack extension appeared, after the body of the email, and the double green ticks next to the send button.
The signature informs the recipient that the email is being tracked, and by clicking on the double green ticks, you have the option to exclude tracking for the email, or access the extension settings panel.
In any case, properly fill in a test email and send it, you will be able to understand how email tracking works.
From this moment on, and not for emails already sent, when you send an email and place the mouse on the icon depicting the double ticks, you can monitor the sending of any email. In this case the sent email has been delivered by the recipient but not yet read, therefore placing the mouse cursor over the icon representing a single green and a gray check, the system will notify you with a popup message that the email has arrived. to the recipient but not yet read. So the first green check indicates the arrival of the e-mail to the recipient, while the second check, still gray, indicates that the recipient has not yet read the e-mail.

When the recipient reads the e-mail, you will notice that the second check will also turn green and consequently you will have the confirmation that the message has been read, in this case only visually. By placing the mouse cursor on the icon depicting the double ticks, the system will also inform you of the time the message was read.

READ MORE: How to fix Windows 10 in 5 different mode.
5. Conclusion
It goes without saying that an email monitoring and tracing system, like this one, is of fundamental importance, when you still want to be sure that email messages have been read.
This system has only one constraint, it is linked to the browser where the mailtrack extension connected to your Gmail account is installed. Therefore, if you move to a second computer, and send an email, even from your account, you will lose the tracking system. So it is necessary that you always send emails from the same computer and with Google Chrome.
The mailtrack extension also has an extension to be installed on mobile devices, iPhone or Android, so you can send emails while monitoring their status, even from your smartphone or iPhone. This solution, even more tempting and safe than the first.
In any case, in this video tutorial you will see live, everything covered in this guide, and therefore, how to install and configure the Mailtrack extension for Gmail.

